This document includes instructions for installation and gameplay. It is recommended that you read this entire document before playing the game to ensure system compatibility, optimal performance, and to learn the basics of playing the game. To view the keyboard quick reference image, click here (you may want to print this image for reference). To view the game's official website, click here. To start the game, double click on the Evochron Legacy icon (displayed below) that is located on your desktop after running the installer. 
* Dedicated video memory exclusively, shared memory is not supported. Shader model 3.0 minimum required, older shader models are not supported. ** Recommended for improved peformance and more space for customizing options. *** Recommended for multiplayer sessions with more than a few players. DirectX 11 support is required for experimental Oculus Rift mode. 64-bit versions of Windows strongly recommended for larger memory addressing. May work on some 32-bit systems with reduced detail settings and maximized memory configurations. However, 32-bit systems may intermittently encounter low memory related errors, such as 'unable to load image' and/or 'unable to create memblock', if sufficient memory resources are not available. 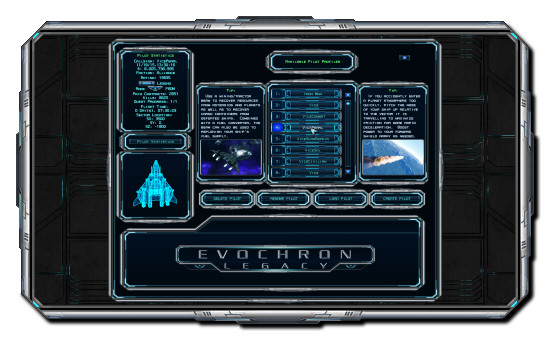
To install Evochron Legacy, run the EVOCHRON_LEGACY.EXE program available from the game's website. The program will guide the installation and install an icon to your desktop (labeled Evochron Legacy). The installation program will also update the game if an older version is already installed in the same folder. This way, you can update the game to a newer version by running the latest installation program while also keeping your settings and profiles. Double click the icon to start the game. The first time you run the game, you will be prompted to enter your pilot's callsign, select the starting role you want to play, select the faction you will be affiliated with, as well as select pricing, economy/technology, and territory control options you want the game to simulate while in single player. When entering your callsign, choose a name you wish to use for both single player and multiplayer. You can change it later without losing your stats with the 'Rename' option in the pilot manager. Your single player and multiplayer performance will then be tracked using your callsign. You can manage up to 100 separate pilot profiles for the game. It is recommended that you back up your pilot profiles occasionally in case you need to restore them or want to transfer them to a different computer. The starting role you select determines what ship you will initially fly, how many credits you are given, and what kind of equipment you start out with. Here is a description of each role and the starting configuration they provide:
The simulation options let you select which elements you want the game to adjust regional values for during gameplay. The Evochron quadrant is divided into 500X500 sector regions for economy/technology, trade, and territory factors. Each region is given an ID number that can be viewed in the nav console's quadrant map mode (more information on these options is available in the nav console section below). Commodity price changes will simulate fluctuations in pricing offsets for the various commodities available in the game's inventory. Price offsets will go up and down in a pattern of supply and demand throughout the various regions in the Evochron quadrant. Economy/technology level changes will simulate variations in each region's overall economic and technological status, which in turn can impact certain pricing conditions, contract pay, and available weapons/equipment. Territory control level changes simulate changes in territory control between the Alliance and Federation based on randomly generated regional combat results. You can optionally disable any of these options to allow for changes only as a result of your actions. Once you enter the callsign, starting role you want, faction affiliation, and simulation options, the next screen will be the main menu. Use the mouse pointer to select menu options. If a game controller is detected, you can also select various control mapping menus from the main Options menu to select the buttons and axis controls you want to use with the game (see the Options section below for instructions on configuring a game controller). If no game controller is detected, the default flight control will be set to the mouse. If you use the mouse for flight control, the wheel (if available) will control your throttle while button one will fire your primary weapons and button two will fire your secondary weapons. By default, you will start out docked at a station, so the main menu's perspective will be from a station's parking hangar. When you start the game, the loading/startup procedure will begin and a docking tunnel will descend over your spacecraft to bring it up to the station's docking hangar. If you save out in open space, metal blast panels will cover your ship's windshield until the loading/startup procedure finishes. 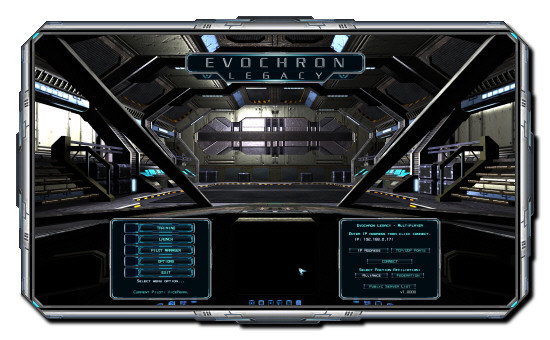
From the main menu, you can select a gameplay mode, change game options, or enter the pilot manager. The pilot manager lets you load, create, rename, and delete saved profiles. It also lets you preview information about each saved profile, including location, wealth, weapons, equipment, and achievements. Single player (selected by clicking on the 'Launch' button in the main menu) will let you play the game alone with computer controlled ships while Multiplayer lets you connect to other players via the Internet or a LAN. Multiplayer includes both human controlled ships and computer controlled ships. A few other gameplay elements will also change when switching between single player and multiplayer. See the multiplayer section below for more details. Interactive training is available and provides basic instruction on controlling your ship, managing ship systems, navigation, building, inventory, trade, combat/weapon systems, descending into planets, mining, and docking with stations. It is highly recommended that you complete the training mode before starting either the single player or multiplayer mode. You can skip most training stages by pressing the Enter key or recall previous stages by pressing Alt-Enter. All training stages are also displayed in text and are saved in the message log, so you can scroll back to review any past stages you've completed in text format as desired. During gameplay, you can save at almost any point by pressing escape or the default F9 key and clicking on SAVE PROGRESS. You can also save your progress in different profile slots by clicking on SELECT PROFILE AND SAVE. A list of the available profile slots will be displayed and the profile slot you click on will then be used to save your current progress as well as any future quick saves. You can also save your game quickly by pressing Alt-F9. The optimal save locations in the game are stations, cities, and carriers. If you save at one of those location, you can park your ship and save your status in a protected environment. If you save in open space, your ship needs to have at least 10 units of fuel to engage the hibernation and standby mode. Your ship will close the blast panels on the windshield and your character will be put into hibernation so that the next time you launch the profile, you will start from the open space location exposed to the elements/threats while waiting for your ship to complete its full startup procedure. So if you do want to save your progress in open space, make sure you have the fuel to do so and are in a relatively safe location away from potential threats. Also, your ship must be stationary in order to save your progress in open space. When you save your progress, your current inventory, position, reputation, wealth, and status will be saved under the current profile you selected/created. However, you will lose a contract if you exit before the contract is complete. It won't be marked as a contract failure on your record, but you will lose the agreement if you don't stick around long enough to complete the objective(s). You may want to save frequently which will let you quickly undo your progress to a recent point. Saving is not available while you are in a shipyard/hangar or during training. You can save with an active contract, but the contract itself will be lost if you exit the game before completing the objective(s). A warning will bring this condition to your attention in the message log if you save your progress during an active contract. 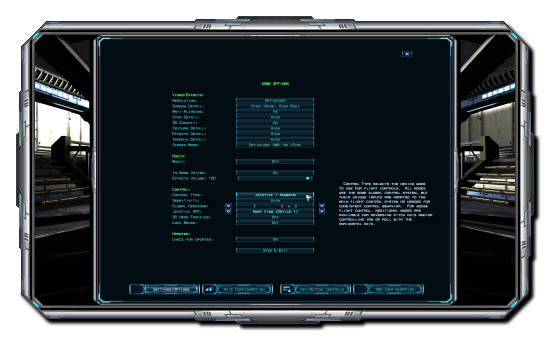
To set up the game for your computer's configuration or to customize your controller settings, simply click on OPTIONS in the main menu. You can fine-tune the game's settings for audio, video, detail, and other miscellaneous options. Here are the various options that you can select in the menu: Video/Effects: - RESOLUTION - Evochron Legacy supports a variety of screen resolutions, including both standard ratios and widescreen ratios. The game will automatically detect which resolutions your system supports. When set to 'Optimized', the game will attempt to use your desktop resolution by default. If you select a resolution lower than your desktop resolution, the game window may not fill the entire screen and/or image quality may be lower. Resolutions below 1920X1080 are generally not recommended due to loss of detail and clarity. - SHADOW DETAIL - Shadow detail is adjustable to improve image quality at higher settings, or improve performance at lower settings. You can also optionally turn off shadow details entirely for the most significant performance gain. 'Low' and 'Medium' settings render shadows using one additional camera index for shadows local to the player's perspective only. The 'High' and 'Very High' settings render shadows using multiple camera indexes across a wider field of view for shadows local to the player's perspective in addition to other nearby objects. The 'High' and 'Very High' modes are only recommended for powerful systems as there is generally a significant performance impact when enabled. - ANTI-ALIASING - Anti-Aliasing helps soften edges in the scene as well as reduce pixel shimmering and flickering for improved image quality. A higher setting will soften/smooth the edges in the scene, but will require more video resources and can reduce framerate performance. - STAR DETAIL - Lets you adjust the background star appearance. If you are running in a low resolution without anti-aliasing enabled, you may want to change this setting to low or medium to reduce background sparkle/shimmering. The high setting provides a detail level that works best with high resolutions and/or anti-aliasing applied. Higher detail requires more memory and may also impact performance. - 3D COCKPIT - You have the option of turning on or off the 3D cockpit. Some players may prefer to filter out the cockpit, leaving only the HUD and displays visible in a fixed position. When the 3D cockpit is turned off, the three lower displays will be rendered as part of the HUD. This may also help boost performance slightly on slower systems as it does reduce the scene's polygon count. - TEXTURE DETAIL - This lets you select the level of detail for textures. 'Low' uses low resolution detail, which may improve performance and/or provide compatibility with older systems that have limited memory resources. 'Medium' or 'High' can be selected to enable higher resolution quality and detail. The benefit of higher texture quality can be greater with higher resolutions. - EFFECTS DETAIL - This option lets you adjust the level of detail for several special effects elements that can have a significant impact on framerate performance. Higher levels of effects detail require more memory and performance for various special effects in the game, including explosions, debris, and smoke. Reducing the detail can help improve the framerate when such effects occur by reducing what effects are displayed and/or their detail: - High - Maximum details. Explosions are rendered in full detail with frequent fire trails and smoke. Debris is also maximized for more pieces when ships/objects explode. This mode generally needs a fairly powerful system to run at higher framerates. - Medium - Moderate details. Debris is reduced to lower required resources to render exploding ships/objects. This mode may work well with many moderate system configurations. - Low - Minimum details. Explosions are rendered without fire trails and smoke effects. This mode may work well on many low performance systems. Minimum system requirements listed above are still recommended for playable performance. - TERRAIN DETAIL - Planetary terrain is one of the most demanding and resource intensive graphics elements in the game. Higher detail settings require more frequent updates to terrain surfaces, renders more mesh detail up close, and uses more memory. For older/slower systems, descreasing the detail level can help improve performance when near planets. - SCREEN MODE - This option offers four main modes, Optimized (WM), Optimized (WM) No VSync, Locked (FS), and Locked (FS) No VSync mode. The Optimized modes run in a window and are generally considered the best modes to run the game in. The locked modes force the game to run in a full screen mode, regardless of what resolution you select. The Optimized modes let you see any Windows dialogue boxes that might open and supports alt-tab to toggle between the game and other applications. Running the game in a Locked mode may cause unpredictable behavior if alt-tab is used, but may allow the game to run on some systems and/or with some 3rd party software that may require a legacy full screen exclusive mode. The No VSync options remove the framerate limit so the game can run at framerates above the refresh rate. As of this writing, an experimental Oculus Rift mode may also be available for those interested to try. Audio: - MUSIC - This option lets you turn the music on or off. If you select 'On', a 'Volume' option will appear that will let you adjust the volume as desired. - IN-GAME VOICES - In game voices are optional. If you would rather not have radio chatter, turn this option off. This setting also effects in-game voice chat in multiplayer. - EFFECTS VOLUME - Lets you adjust the volume level of the in-game sounds. Control: - CONTROL TYPE - You will notice several modes for controlling the ship. Here are the various settings and the recommended uses: - KEYBOARD - Uses arrow keys for ship control. Best for players who want to use the keyboard only or do not have a game controller connected to their computer. Some form of mouse control would still be recommended though, see below. - MOUSE DIRECTION NORMAL - This lets you use the mouse as if it were a joystick. If you move the mouse in a particular direction, the game will respond by how far the mouse is moved. Once you stop moving the mouse, the game will re-center the movement, just as if a joystick control was centered. This option works well with laptop touch stick mouse controls. A sensitivity control option will appear when either this or the REV Y mode are selected. - MOUSE DIRECTION ROLL X - This mode uses the X axis on the mouse for roll instead of yaw. - MOUSE DIRECTION REV Y - This reverses the direction on the Y axis channel. In the NORMAL mode, moving the mouse/touch stick down lifts the nose of your ship as though you were pulling back on a joystick. REV Y will change this control so that moving the mouse/touch stick down will drop the nose of your ship and moving the control up will lift the nose of your ship. - MOUSE DIRECTION ROLL X REV Y - This option uses the X axis on the mouse for roll instead of yaw while also reversing the Y axis. - MOUSE POINT - This option lets you move the ship with a mouse pointer. You can place the pointer in a certain position and the ship will continue moving in a direction until you center the pointer. This option works well for players familiar with mouse pointer control. An adjustable deadzone/sensitivity option will appear when this control mode is selected. You can also fine tune the sensitivity setting further by editing the first line of the file in the game's default installation directory entitled mdeadzone.cfg. A value of 1.0 will give you a very wide deadzone/low sensitivity, a value of 4.0 will be the default setting which is a small deadzone and moderate sensitivity. Values above 4.0 up to 10.0 will offer an extremely small deadzone and high sensitivity. - MOUSE POINT ROLL X - This mode uses the horizontal position of the pointer for roll instead of yaw. - MOUSE POINT REV Y - This reverses the direction on the Y axis channel. In the default POINT mode, moving the mouse down drops the nose of your ship. REV Y will change this control so that moving the mouse down will lift the nose of your ship and moving the control up will drop the nose of your ship. - MOUSE POINT ROLL X REV Y - This option uses the X axis on the mouse for roll instead of yaw while also reversing the Y axis. - JOYSTICK - This option uses the default game controller for ship movement. The controller that is listed first in your Windows game controller's list will usually be the default controller for the game. It is recommended that you enable a joystick as the default game controller for this option. You can select different installed control devices when mapping axis channels and buttons by using the left and right arrow keys at the top of the AXIS CONFIGURATION or KEY/BUTTON CONTROLS menus. - SENSITIVITY - Selects the stick sensitivity. Some controllers may cause undesired sudden movements in gameplay. To reduce the effect of this problem, you can decrease the sensitivity setting. For digital controllers with optical ('no contact') technology precision you may want to set this option to HIGH as that setting will provide maximum responsiveness. - GLOBAL DEADZONE - When the joystick or mouse point control mode is selected, this option will appear. It lets you expand the global deadzone for all control axis inputs, increasing the central response area for your game controller. If unwanted yaw, pitch, or roll rotation occurs when you center your controller, increasing this setting will help prevent the problem. For game controllers/joysticks, you can also optionally increase each axis channel's individual deadzone further in the Axis Configuration menu. - JOYSTICK HAT - You can set the HAT option to SNAP VIEW, STRAFE, PAN, SHIELDS, or OFF. When set to SNAP VIEW, the HAT allows you to control the pilot's viewing direction (up, left, right, and rear views), if your controller is equipped with a HAT option. When set to STRAFE, the HAT will control your vertical and horizontal strafe thrusters. When set to PAN, the HAT will control the pilot viewing direction by panning. The PAN mode does not auto-center itself like the SNAP VIEW mode does when you center the HAT, so you will need to manually re-center the viewing direction. When set to SHIELDS, the HAT will control shield augmenting for each directional array (front, left, right, and rear). The HAT can also be used to pan around your ship in the second external view mode. - 3D HEAD TRACKING - This option enables support for the TrackIR view control system, which will let you control the pilot's view by turning your head. As of this writing, an experimental Oculus Rift mode may also be available for those interested to try. - LOCK MOUSE - This option will attempt to lock the mouse to the game's display field. This may help users with multiple monitors or reduced windowed modes keep the mouse focused within the game's display field exclusively. Once activated, you can enter the exit menu to pause the game and bypass the lock to allow the mouse to pass outside of the game's display field. Updates: - CHECK FOR UPDATES - This option will periodically check for updates to the game when set to ON. 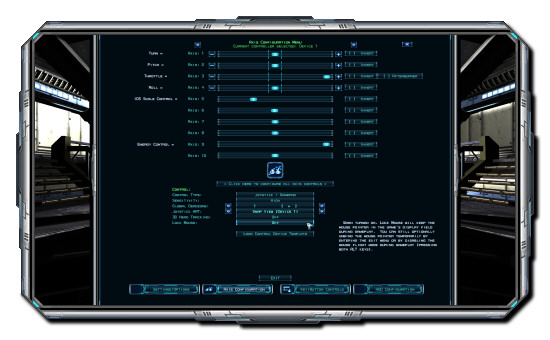 This menu lets you customize the functions of your controller's flight axis controls. The flight axis settings will appear with each available input channel you can use to control your ship. You can click on the 'Configure All Joystick Axis Controls' option to assign axis channels on your controller to the various flight controls in sequential order. Simply follow the instructions to set a particular axis channel to each flight rotation or other optional control. If your controller doesn't support a particular control, simply select NO AXIS and use the keyboard or mouse option for the control. You can also optionally configure each individual axis channel on its own by simply clicking on the axis channel you want to change, then click on the function you want to map to it. The input can be reversed for any configured axis channel by clicking on 'Invert' to the right of the signal indicator. An 'X' will appear in the box next to the word 'Invert' when active. The throttle axis will also have an 'Afterburner' option next to its signal indicator, which when enabled will let you activate the afterburner when the throttle axis is moved to its near maximum limit. For certain flight controls, you can also increase the deadzone for individual axis channels. For flight controls that offer an individual deadzone option, plus and minus buttons will appear on each side of the channel's input indicator. Click on the plus button to increase the channel's individual deadzone beyond the global deadzone setting. Click on the minus button to decrease the channel's individual deadzone down to the limit of the selected global deadzone setting. The individual axis deadzone setting will be indicated by blue lines on each adjustable axis channel while the global deadzone setting will be indicates by green lines. If the individual axis deadzone setting is 0, the base deadzone value will match the global setting and only blue lines will be visible. Once the individual axis deadzone is greater than 0, you will see the original global setting appear with green lines and the individual setting appear with blue lines farther out where the new unique response target is indicated. Increasing the global deadzone setting will increase the minimum starting level of deadzone to be applied before individual deadzone values are applied. This way, you can adjust all flight axis controls together or set a minimum response level and then apply different additional deadzone levels on a per axis basis. You can optionally toggle between the main Settings/Options menu to adjust the global deadzone, then return to the Axis configuration menu to adjust individual deadzone settings as desired. Both the axis menu and key/button controls menu also let you change the current device in case you have more than one game controller connected to your computer. Use the left and right arrows at the top to change the control device while you are mapping axis channels or buttons. To test which device is currently active, simply press buttons on it or move it around to observe which input signals are responding. You can select a different device while you are mapping controls, so you can bind each function to a different device as desired. The game supports up to 10 control devices simultaneously. The game will read devices based on however Windows has them listed and sorted. So if the device order in Windows changes due to new devices being plugged in/installed or unplugged/uninstalled, the game will generally adapt to the new list order as well. This way, you can manage the device order in the game by simply managing the list in Windows. It also means that if the device list quantity or order changes, you may need to update your control configuration settings in the game for the new device list sequence. The first seven axis channels available for each device in the menu are matched with the device you select, channels 8-10 use a separate input system that provides additional input options for some devices. You can manually control input selection for channels 8-10 using the method explained in the technical notes section below. The axis configuration menu also lets you load preset control mapping profiles for particular devices. Click on the 'Load Control Device Profile' button to review available profiles. To load a profile and apply its control bindings, simply click on the name of the profile to load. The axis and button bindings will then be applied for the currently selected control device. You can create your own control mapping profiles by editing one of the text files included with the game (ControlProfile1.txt). Simply save the file with a higher number (ie ControlProfile2.txt), then change the values in the file as desired for the control configuration you want. You can leave out lines for axis or button controls you don't want to change and just edit the ones you do, leaving behind any existing axis or button controls in place. You can also set up multiple profile files for multiple devices with lines to bind specific button or axis controls only. This way, you can set up specialized control configurations that are device specific and can be quickly loaded later without having to manually set up axis and button controls. 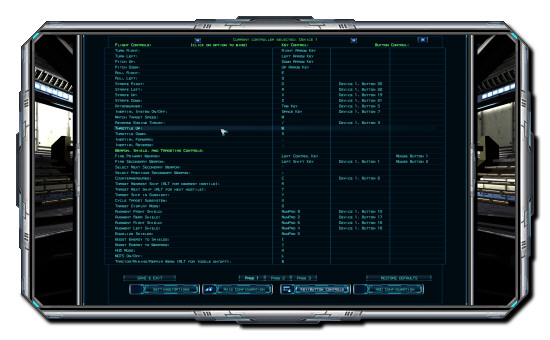 They key/button controls menu lets you configure available keyboard keys, controller buttons, and mouse buttons. The menu also lets you quickly locate the function of a particular controller button by simply pressing the desired button on the controller (the button number will show at the bottom and a green box will appear next to the button control, if it is mapped to a function). To assign a button or key to a function, simply click on the function you wish to change. The game will prompt you to press the button or key that you want to bind to the function. Once you press the desired button/key, it will be assigned to the selected function. Any adjustments you make are saved. If there is a conflict caused by one button or key being assigned to two functions, the game will indicate the conflict for you by highlighting them in red. You can also clear the assigned key or button with the options near the bottom of the screen. You may want to test each button to verify what it controls before exiting the menu. A few keys (such as the escape key) are locked and can't be altered, but you can change nearly any other key function as desired. For joysticks and game controllers, Evochron Legacy supports up to 32 controller buttons per device. For mouse input, the game supports up to 8 buttons. 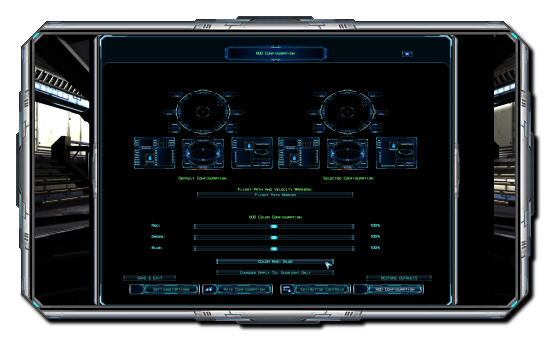 This option lets you change the coloring of the gunsight and various display graphics. You can adjust the red, green, and blue levels with the slider bars and change the default hue to a different color scheme. Changing all of the RGB levels to the same percentage value will also let you brighten or darken the HUD and display graphics. You can also select the movement marker mode. The 'Flight Path Marker' will point to the direction your ship is moving on the HUD. The 'Horizontal/Vertical Velocity Marker' will visually display the level of horizontal and vertical speed on the HUD. You can select one marker or the other, or display both at the same time. 
So just what can you do as an independent spacecraft pilot? There are many ways to earn credits and survive in the game's universe. Some involve combat, such as contract fighting and attacking other ships. Others involve exploration, such as mining asteroids or planets, locating high paying stations for commodities, finding upgrade hotspots, and hunting for hidden benefits. You may want to design your ship for speed and compete in either timed or ship-vs-ship races. You can simply clean nearby solar arrays for some quick credits or retrieve lost items for the local faction. You can also trade with other ships and stations or deliver items under conditions of a contract. You may also want to harvest metal ore resources to help build station and city structures for the local faction. Each of these gameplay aspects have many additional elements which require practice and knowledge to master. Combat alone requires substantial skill and training to survive in more hostile areas of space. It can pay in the long run to spend the time and credits to improve your abilities and ship so you can survive later on when you reach more advanced areas of Evochron. Evochron Legacy gives you the freedom to play the game in a variety of ways. Its freeform design lets you travel where you want and complete the activities you want. You can complete a quest offered to new players for a scripted type adventure or you can focus on exploration, combat, mining, racing, trading, building, or a variety of other activities. You can also switch between the quest objectives and other activities when desired. To retrieve a past quest message, simply click on 'View Last Quest Message' in the quest menu and the last message will be displayed. It's a good idea to have a well equipped ship and enough credits to survive the quest as you'll pass through many of the most challenging areas of the game's universe. 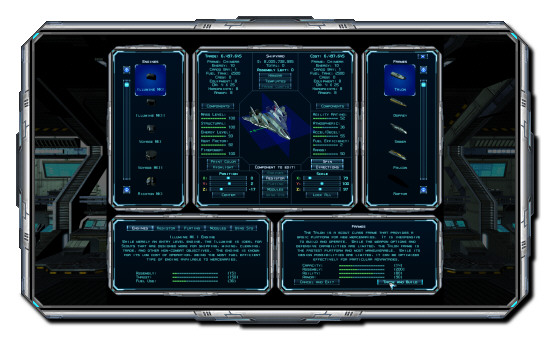
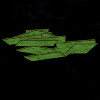
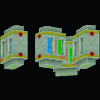
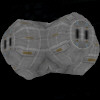
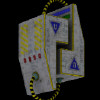
One of the most important activities in the game is designing your ship. This is done in the shipyard, which is available at stations, carriers, and planet cities. The shipyard lets you select options for your ship to customize its capabilities and appearance. For civilian ship frames, you can adjust many parameters for your ship's flight performance, weapon management/capacity, defensive capabilities, cargo capacity, and appearance. Military ship frames are much more restricted in their design flexibility. One of the first things you may want to do in the game is spend some time in the shipyard to learn about the various options available to you and how to best use them for your gameplay interests. To access the shipyard, fly to a docking hangar near the top of a station's command module, a carrier hangar, or in the middle of a city with a docking platform on a planet. The automatic tractor beam will engage and your inventory console will be opened. More information on docking is available in the 'Landing and Docking' section below. Once you have docked, simply click on 'Enter Station/Carrier/City' then 'Shipyard' to open the menu shown in the image above. Once you enter the shipyard, your current ship and its ship/frame configuration will be displayed at the top left of the middle menu display. At the top of the list is the current trade value for your ship and its configuration. The frame class, number of energy cores, cargo bay limit, fuel limit, crew capacity, equipment slots, countermeasure pods, hardpoints, and armor level are displayed by default. Click on the 'Components' button to display the parts installed on your ship. When activated, the engine class (including standard cruise speed limit at X1 IDS in parenthesis), number of resistor packs, hull plating, module, and wing/thruster system will be displayed. You can click on 'Ship Config' to return to the default display as desired. The ship you are designing is displayed on the top right of the middle menu display. It uses the same layout as the list on the left side, so you can quickly gauge any differences between your current ship configuration and the new one you are designing. The 'Cost' value at the top indicates how many credits you will be required to pay to build the new ship you are designing. Between the two lists is the amount of credits you currently have in your account followed by the cost difference between your current ship and the new one next to the 'Total' label. If the total amount is positive, your ship's trade in value won't be high enough to cover the costs of the ship you are designing, so you will be required to pay the amount displayed in order to build the ship. If the amount is negative, then your current ship is worth more than the build cost of the new ship, resulting in a gain of the amount displayed to your account if you trade in your ship and build the new one. Below the 'Total' value is the remaining assembly resources left, establishing the available capacity for frame components (also referred to simply as 'parts') you can install on your ship (more on this will be reviewed below). Below the assembly left value are buttons for storage hangar access, templates, and frame configuration. These will be reviewed below. In the middle of the menu display is a rotating model of the ship you are designing. You can left click and hold the mouse button down to rotate the ship around to view it at different angles. On each side of the rotating model are performance specifications for your design. Values for mass, structural integrity, energy level, heat factor, firepower, agility, atmospheric performance, acceleration/deceleration, fuel efficiency, and range are provided. You can customize your ship's appearance by using the position and scale sliders in the lower part of the the middle display. If you make a change you don't like, simply right click on a slider to reset its value to center. Available buttons one each side provide paint color and display options. For visual enhancement while editing your ship, you can highlight the component you're editing and paint your ship a different color (civilian frames only). You can also stop the rotation, and/or remove the direction planes. In the middle are the 'Component to Edit' buttons which let you select the part on your ship to edit for scaling and positioning. For positioning, you quickly lock a part to the middle values with the 'Center' button and for scaling, you can lock the values together with the 'Lock' buttons so the part scales at the same leve in all directions. Available frame components are displayed on the left upper side menu, available frames are displayed on the right upper side menu. Descriptions of each ship component and frame are available on the bottom two displays of the menu. Use the scroll bars on either side menu to toggle through the available options, then click on one to read its description. To design a ship, select a frame from the right side menu by left clicking on it and holding the mouse button down, then drag and drop it over to the middle display. If you're designing a civilian ship, the Frame Config menu will open automatically and lets you adjust the available frame's configuration capacities for crew members, equipment hardpoints, countermeasures, secondary weapon hardpoints, hull armor plating, energy cores, fuel tanks, and cargo bays. Each ship frame will have a certain Design Capacity resource value with which you can increase or decrease the setting for each design parameter. The Design Capacity resource value is displayed after the frame's name in the second line at the top of the frame configuration menu. To change the limit or capacity of a parameter, simply click on a box under the capacity number you want to increase or decrease. You'll generally need to balance your frame configuration for the role(s) you want to play. When you've configured the frame parameters the way you want, click on 'OK' to save the configuration and return to the main shipyard menu. Next, you can select the parts you want for your ship. You can toggle through the 5 different ship components by clicking on each one on the bottom left display. Each frame provides a certain level of assembly resources that you use to select and install certain parts for your ship. Assembly resources are generally based on the size of the ship you are designing. As mentioned earlier, the available amount of assembly resources is displayed at the top of the middle menu display next to 'Assembly Left'. Larger frames provides more assembly resources and offer better shielding/armor, but aren't as maneuverable or as fast and use more fuel. If you design a ship that exceeds the assembly resources available for the frame you selected, the 'Assembly Left' value at the top will turn red and you'll need to reconfigure your design to stay within the resource limit. Each component will use a certain amount of the assembly resources and will effect various aspects of your ship. Higher class engines provide more thrust for better acceleration, but use more fuel. A smaller ship may not necessarily need a more powerful engine, since their lower mass needs less accelerative forces to propel them. But a heavier ship can benefit significantly from higher class engines to help compensate for their increased mass. Engines are designed to use the same connection systems and weigh about the same. So the weight factor between different engines is very minimal as higher class models typicially use lighter weight materials in their construction, which cost more but offset the increase in size that would otherwise require having more weight. Resistor packs help insulate your ship from the effects of energy weapons. The ship's hull is used as a conductor to transport some of the weapon energy to the resistor packs, where it is safely discharged. More packs can absord more energy to reduce the potential damage from weapon fire. However, additional packs will also add to the mass factor of your ship as their weight is significant. Hull plating is the skin of your ship and you can choose one of several different materials to construct it from. Each material type offers a unique benefit. Read the descriptions carefully to determine which material you'd prefer your ship to have. Each ship also has one slot for a core module that can provide your ship with an additional benefit. Again, the descriptions will detail what each module can provide. The last option provides wing and thruster systems, which can improve agility both in open space and in planet atmospheres. Just as with frame parameters, you will also need to carefully prioritize your part selection for the features that are most important to you and the role(s) you want to play. Once you've designed your ship the way you want, simply click on 'Trade and Build'. You will be given credit for your current ship as a trade-in, then any additional amount will be deducted from your account as may be required. As mentioned earlier, the difference between the value of your current ship and the cost of the ship you want to build will be shown at the top of the middle display next to 'Total'. If the ship you are trading in is damaged, the total cost for repairs will be deducted from its trade-in value and the adjusted amount will be displayed in red. You can save the current ship design with the template option. Click on Templates near the top of the shipyard menu, then click on 'Save Current Design as Template'. You can reload a design later to rebuild it, although you will need to be docked at a station that can build the ship saved in the template. Templates are saved in the game's data folder using the filenames shiptemplateX.sw where X is a number from 1 to 25. All of your profiles will have access to the ship templates and you can even share them with other players by giving them a copy of the file(s). A storage hangar option is also available near the top of the shipyard menu (as well as in a station lobby) and it lets you store a ship and up to 25 containers of cargo. The storage hangar option is only available at trade stations and you are required to pay a fee to rent the space. There is a limit of one hangar per pilot at each trade station, but you can rent as many individual hangars from trade stations as you want and can afford. Hangar fees are a transaction charge and will apply for any hangars you are storing ships or cargo in. So you will be charged a displayed fee when you change the items you have stored. It's best if you minimize such transactions to reduce your costs. Wait until you have as many items as you want ready for transfer before changing hangar contents. If you want to store the ship you are flying at an empty hangar, you'll need to rebuild your current ship so you are never left without a ship. This will be done automatically for you when you select the Store option in the hangar if you have the funds to build another ship of the same design. You can then change the design as desired once you've stored the original. To recover a stored ship, simply use the Swap option that will appear once a ship is in storage. Your stored ship will then be exchanged with the ship you are currently flying and the contents will attempt to be transferred between the two so you still have the weapons, equipment, crew, and cargo you currently have. If the ship you are swapping to can't carry the same items, they will be discarded or sold. So make sure you sell or store them before you change ships, if you want to recover the credits for them or use them later. If you have crew members and swap to a military ship or a civilian ship with fewer crew slots, they will be set to inactive. They can travel with you, but won't be able to provide a benefit to your ship. You can optionally change the position of a crew member in the list to the top slot by holding the ALT key down in the Crew Management Console and then clicking on the 'Top' button that appears next to their listing. The game will autosave your progress any time you make changes to a hangar.
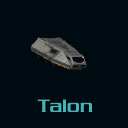
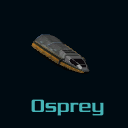
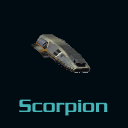
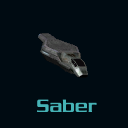
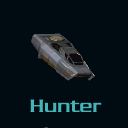
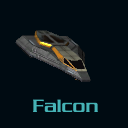
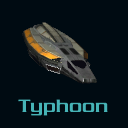
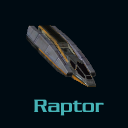
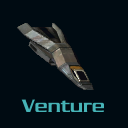
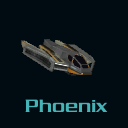
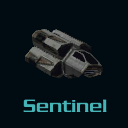
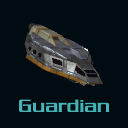
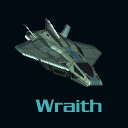
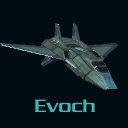
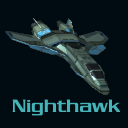
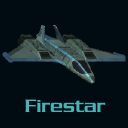
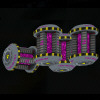
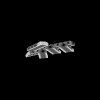
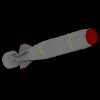
You should always consider your own survival, wealth, and reputation when making any decision. Remember that many actions you make effect your personal reputation, which in turn effects how you will be paid and treated in the future. Earn a reputation for completing contracts by performing well and the amount offered to you will increase over time. If you fail or cancel contracts, then you won't build your reputation record to increase your pay. So be sure to select contracts you are capable of completing to increase your reputation rating and improve your long term pay benefits. There are two reputation records that track your performance, civilian and military. First, there is a civilian rank and reputation rating that is based on your wealth, resources, and past contract performance. This combined score gives the faction you are allied with an overall profile of your potential capability. From this score, a base pay amount is established for the location you are at for various contract objectives. Objective difficulty and importance can also play a significant factor in establishing the base pay amount. The other reputation record tracks your military performance. This score establishes a military rank that you earn by completing objectives for your faction's Navy in war zones. The score is simply a total of military objectives you complete successfully. A military rank is given to you based on this score and the rank determines what level of authority you may have under certain conditions as well as establishing what types of military spacecraft you will have access to. A higher military rank gives you access to more advanced military spacecraft. Military combat objectives can be very difficult to complete, especially for a new pilot, since they generally involve engagements with Vonari forces. So you'll likely want to wait until you've built your combat skillset and ship configuration sufficiently to succeed in such scenarios. In civilian space, combining forces can improve your success in combat. In single player, you can recruit other ships to join you in a fleet for improved combat protection. Recruiting other ships will require paying each ship a fee to be part of your fleet. When you are not in the game, fleet ships are free to pursue their own interests. They may also change their ship designs and will reload their weapons while you are away. Next time you return to the game, the ships in your fleet will rejoin you. Establishing a fleet can offer substantial protection or assistance in combat. However, fleet ships won't follow you into military war zones, so consider them an option for civilian space only. Fleet ships will generally avoid wasting fuel and expensive missiles, so don't rely on them entirely to always be there or to provide a high level of combat effectiveness. They will be linked to your navigation system, so when you use the jump drive to travel, they will arrive with you at the jump point. Fleet ships can be an effective way to help build your civilian contract record. Another way you can use nearby allies is to issue attack orders in war zones. When you accept a mission in a war zone, other military spacecraft will meet you at the waypoint to assist you. If your rank is high enough, the other ships will likely follow your orders. In multiplayer, you must also be the flight leader for the mission to issue orders. The player who is the flight leader in the sector is usually the highest on the player list, other players will see a '=' flash next to the flight leader's name while the flight leader themself will see a '-' next to their name. Here is an image showing the various ranks: 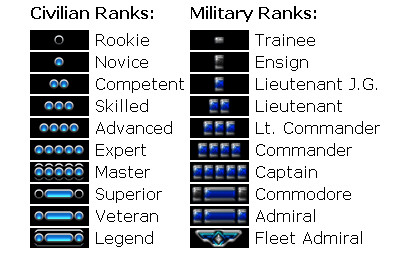 
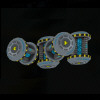
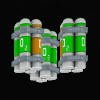
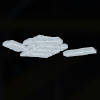
One of the first items you might want to purchase, if your ship isn't already equipped with one, is a mining/tractor beam. It is an extremely valuable piece of equipment to recover cargo left behind after a battle, recover fuel when used with a converter, recover items from cargo containers, and as a tool to mine from asteroids and planets. The beam has a range of about 100 meters for cargo recovery and can be activated by holding the default B key down. To recover lost cargo, fly to within 100 meters of the cargo and hold down the default B key until the beam reaches full strength. The cargo material will be transported from its location and deposited in your cargo bay. Any material you don't have room for will be discarded. Use the same technique to recover items from cargo containers. If a container is holding a weapon, the tractor system will attempt to install the device directly onto your ship. If your ship doesn't have room to install the weapon, it will be placed in your cargo bay automatically. To mine material from asteroids, fly very close to one and hold the default B key down while panning the beam through the inside of the asteroid. Press Alt-B to lock the beam on until you press B again to turn it off. You will see bright red pieces of heated rock spark from the asteroid as the beam cuts into it (if you don't see this effect, then you aren't close enough to the asteroid to mine it). If any material can be recovered, it will be deposited into your cargo bay. Some asteroids may not offer much, others might offer very valuable material. The ship's auto-sorting system collects compatible materials in each cargo bay and blocks incompatible material types. Each unit of a material is a specific shape and size and they are only compatible with each other within individual cargo bays up to the 25 unit limit, so you will need to pre-sort your cargo bay(s) if you want to recover particular materials. You can sort through it by selling or discarding (click on a cargo bay while in open space) what you don't want to make room for what you do want. The auto-sorting system can be useful when mining by helping you quickly sort through what you recover. To recover photon particles for fuel with a fuel converter, simply activate the beam while you're inside a nebula cloud or flying close to a star. Don't forget to explore. There are numerous weapons, upgrades, and commodities that you can purchase and transport. There are also many storage containers scattered across the Evochron quadrant, some of which are in or near shipwrecks. Many of these containers are used by shipping companies, military forces, and manufacturers as storage stations for the items they build and recover. The container owners prefer to keep the locations secret, so they are not logged in your navigation map database. If you want to find them, you will need to search visually. Some are kept hidden in nebula clouds, others are simply placed in distant corners of systems away from most traffic. If you locate a container, you can scan its contents by getting very close to it (with the nose of your ships facing the container), then activating the tractor beam, the container's stored contents will then be displayed on your Heads-Up-Display. If you let the tractor beam reach full power, one item of the container's contents will be transported to your ship (if your ship has the necessary cargo space or weapon capacity available). If you locate an item you want, but don't have space for it on your ship, you can sell an item to make space available, discard it by clicking on it, or jettison your cargo bay, if desired. Exploring can also result in discovering hidden solar systems and planets. Some of these distant locations may offer unique equipment not found in the more charted regions of Evochron. You may find experimental weapons and technology that will greatly enhance your ship's capabilities. They may also pay much better for contracts and commodities. It's a good idea to save such locations in your map log for future reference. As you increase your wealth, you may want to hire a crew. Hiring crew members can enhance the capabilities of your ship and its systems. An engineer can help improve the performance of an automated repair system to restore your ship systems (engine, navigation, and weapons) and armor faster than the system can perform repairs on its own. A navigator can help alert you to important objects in space, such as wormholes and hidden cargo containers, at a much greater range. They can also help protect you from making dangerous jumps too close to planets or moons. A weapon operations specialist can tweak your primary weapons to improve their firing capacity (also improving their long term yield). A science operations specialist can alert you to important benefits in a sector as soon as you arrive, including asteroid field locations, planets that have material to mine, wormhole locations, hidden containers, and dense nebula cloud locations. They can also improve the efficiency of your mining beam, letting you mine materials more quickly when stationary. You can also deploy temporary deploy modules or build longer term station modules. These options are available in the Build Console and require you to have the needed Deploy or Build Constructor installed on your ship. Metal ore is also required to build such structures. Details are available below in the Build Console section. Certain activities will auto-save your progress. If you transfer items to or from a station hangar, the game will automatically save your progress. Some online activities will also auto-save your progress, including player-to-player trades and jettisoning cargo.
All in-game menus can be managed with the mouse. If you've selected joystick or keyboard flight control, move the mouse to make the pointer appear. When a console or other menu is open, simply move the pointer to the option you want and left mouse click. The mouse pointer has two modes for these options, flight mode and selection mode. The first image below is the flight mode and the second in the selection mode:   Flight Mode Selection Mode While in flight mode, the pointer is used for controlling the ship (if using the Mouse Point flight mode), selecting targets, and selecting options on the HUD. To select a target, simply left click on it when it's in your forward view. HUD options are displayed at the top center of the screen. You can open the navigation, build, inventory, or trade console as well as activate the jump drive and autopilot functions. Hold the pointer over a HUD option to display its description. If you're using a mouse flight control mode and don't want to change direction when clicking on a console button or targeting a ship, hold down the ALT key to temporarily disable flight control response. You can also optionally press both ALT keys to toggle between the flight and selection control modes. When the navigation, build, inventory, or trade console is opened, the pointer switches to selection mode. Simply left click on an option to select it. Additional options are sometimes available by right clicking, such as transferring an item from your ship to the cargo bay instead of selling it. When a console is closed, the mouse returns to flight mode by default. Your ship will display warnings, activity prompts, and other information in white text on the left side of your HUD in the message log. This information can help guide you with important information, alert you to a problem, or prompt you when a system activity occurs. Multiplayer text chat messages will also be displayed using the same system. If a series of messages appears, it may obscure your forward view slightly. If this happens and you want to remove messages, simply press the Numpad / key to remove one message at a time. If you miss a message, you can retrieve old messages by holding down the ALT key and then pressing the Numpad / key. You can clear the screen of all messages by pressing the default numpad * key. You can also use the controls to the left of the message log. The message controls will appear any time a message appears. If no messages are visible, you can bring up the message controls by moving the mouse to the upper left corner of the screen. If you are using a mouse flight control mode, you'll need to hold the ALT key to bypass flight control. Once the pointer is near the top left of the screen, the controls will appear along with the last logged message and the mouse pointer will change from the flight control mode to the selection mode. To remove the message and controls, simply move the pointer away from the controls until it changes back to the flight control pointer, when the last message fades away, the controls will also disappear. Here are details on each of the control options:  This button works just like the numpad * key to clear all messages from the screen and it will also remove the controls from view. However, if you do not move the mouse pointer away from the controls within about a second, the last remaining message will continue to be displayed. Once you move the mouse pointer away from the controls, the last message will eventually fade away and the controls will disappear from view. You can also limit the number of chat message lines displayed to three by right clicking on this button to activate the reduced text mode. This mode also removes most of the control buttons. Right clicking on the button again will return to the default text mode. This button works just like the numpad * key to clear all messages from the screen and it will also remove the controls from view. However, if you do not move the mouse pointer away from the controls within about a second, the last remaining message will continue to be displayed. Once you move the mouse pointer away from the controls, the last message will eventually fade away and the controls will disappear from view. You can also limit the number of chat message lines displayed to three by right clicking on this button to activate the reduced text mode. This mode also removes most of the control buttons. Right clicking on the button again will return to the default text mode.
 This button works like a 'Page Up' key. It will scroll through the history of logged messages 20 lines at a time. This button works like a 'Page Up' key. It will scroll through the history of logged messages 20 lines at a time.
 This button scrolls through the history of logged messages 1 line at a time (same as ALT-Numpad /). This button scrolls through the history of logged messages 1 line at a time (same as ALT-Numpad /).
 This is the scroll bar. This control gives you quick access to the entire message log from oldest to newest, just left click anywhere on the bar and hold down the button, then move the bar to scroll through the messages. You can also optionally hold the mouse pointer over the scroll bar and use the mouse wheel to scroll through the messages. This is the scroll bar. This control gives you quick access to the entire message log from oldest to newest, just left click anywhere on the bar and hold down the button, then move the bar to scroll through the messages. You can also optionally hold the mouse pointer over the scroll bar and use the mouse wheel to scroll through the messages.
 This button scrolls ahead 1 line at a time (same as Numpad /). This button scrolls ahead 1 line at a time (same as Numpad /).
 This button works like a 'Page Down' key. It will scroll ahead 20 lines at a time until the last group of 20 message lines are visible. You can trim away any remaining messages by using the 1 line button above. This button works like a 'Page Down' key. It will scroll ahead 20 lines at a time until the last group of 20 message lines are visible. You can trim away any remaining messages by using the 1 line button above.
 In multiplayer, this button is available and lets you select the voice chat mode. Voice chat lets you talk with other players in multiplayer using a microphone. The 'Sector' mode lets you broadcast to all other players in the same sector. The 'Faction Only' mode keeps your broadcast private and only players with the same faction ID tag ('ALC' or 'FDN') in their callsigns will hear you. In multiplayer, this button is available and lets you select the voice chat mode. Voice chat lets you talk with other players in multiplayer using a microphone. The 'Sector' mode lets you broadcast to all other players in the same sector. The 'Faction Only' mode keeps your broadcast private and only players with the same faction ID tag ('ALC' or 'FDN') in their callsigns will hear you.
 In multiplayer, this icon will indicate when voice chat has been disabled. In multiplayer, this icon will indicate when voice chat has been disabled.
 In multiplayer, this button is available and lets you select the text chat mode. Text chat lets you talk with other players in multiplayer by entering text messages with the keyboard. To send a text message, you simply press the ENTER key to activate the text entry mode, then type your message, then press the ENTER key again to send it. The 'All' mode broadcasts your text message to all players set to receive all messages. For receiving messages, the 'All' mode will let you receive any text messages from other players using the same mode or who are in the same sector using the 'Sector' mode. The 'Sector' mode lets you broadcast to all other players in the same sector (and again, if they have selected either the 'All' mode or 'Sector' mode and they are in the same sector, they will see the message). For receiving, the 'Sector' mode will disable all other incoming messages from players using the 'All' mode and incoming messages from players in other sectors. This mode can help limit the amount of text traffic for more populated servers. The 'Faction Only' mode keeps your broadcast private and only players with the same faction ID tag ('ALC' or 'FDN') in their callsigns will see your messages. Like the 'Sector' mode, the 'Faction Only' mode will also filter out incoming messages from the 'All' mode. In any chat mode, system messages from the server and event messages will still be displayed. In multiplayer, this button is available and lets you select the text chat mode. Text chat lets you talk with other players in multiplayer by entering text messages with the keyboard. To send a text message, you simply press the ENTER key to activate the text entry mode, then type your message, then press the ENTER key again to send it. The 'All' mode broadcasts your text message to all players set to receive all messages. For receiving messages, the 'All' mode will let you receive any text messages from other players using the same mode or who are in the same sector using the 'Sector' mode. The 'Sector' mode lets you broadcast to all other players in the same sector (and again, if they have selected either the 'All' mode or 'Sector' mode and they are in the same sector, they will see the message). For receiving, the 'Sector' mode will disable all other incoming messages from players using the 'All' mode and incoming messages from players in other sectors. This mode can help limit the amount of text traffic for more populated servers. The 'Faction Only' mode keeps your broadcast private and only players with the same faction ID tag ('ALC' or 'FDN') in their callsigns will see your messages. Like the 'Sector' mode, the 'Faction Only' mode will also filter out incoming messages from the 'All' mode. In any chat mode, system messages from the server and event messages will still be displayed.
 In multiplayer, this color spectrum will appear next to the chat text mode button. You can optionally change the color of the text you send out to other players to help distinguish your messages from others. In multiplayer, this color spectrum will appear next to the chat text mode button. You can optionally change the color of the text you send out to other players to help distinguish your messages from others.
Your ship is equipped with 4 main system consoles to manage navigation, building, inventory, and trading. You can use the F1, F2, F3, and F4 keys to open the various consoles, or use the mouse to click on a console button at the top of the HUD (remember that holding ALT down will temporarily disable mouse flight control when using a mouse flight control mode). To close a console, press the same F key or mouse click on the X at the top right of the console display. Here is a description of each console: 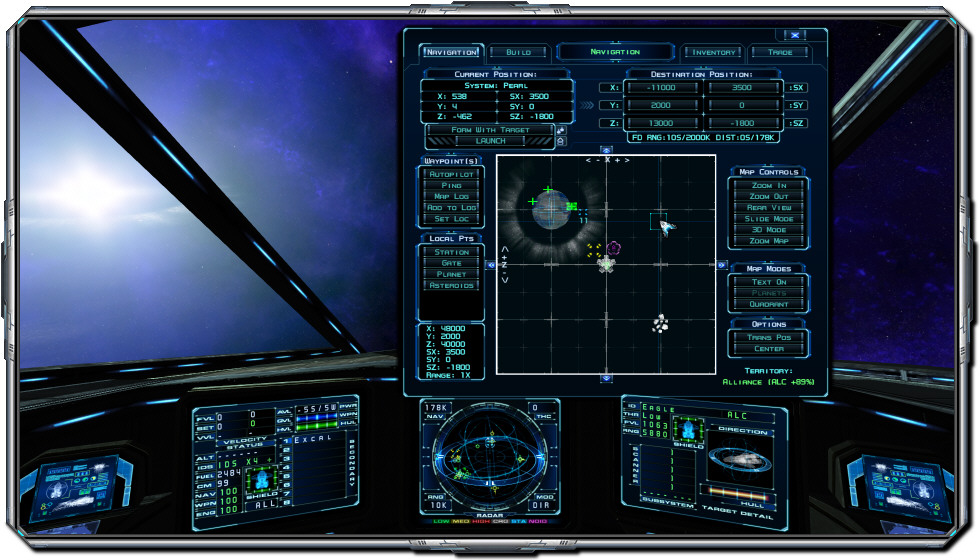 For the navigation map, the game's universe is divided into cube sections called sectors. Sectors use the SX, SY, and SZ coordinate values in the 'Current Position' and 'Destination Position' sections of the navigation console. Sectors are organized numerically from the center of the Evochron system with Sapphire located at 0 SX, 0 SY, and 0 SZ. The image below explains this layout: 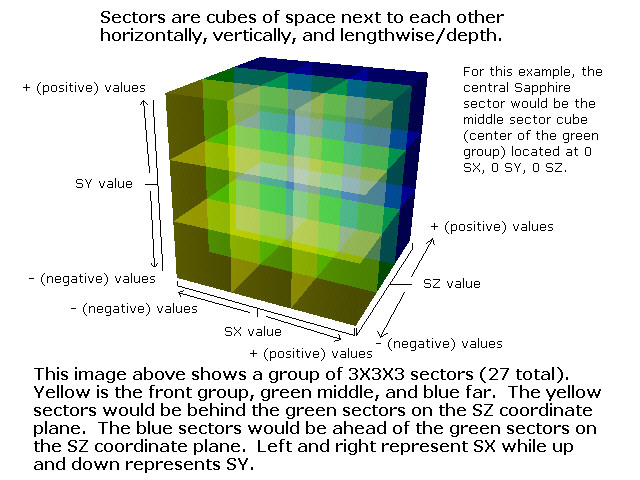 Each sector consists of 200,000 units of width, height, and depth using X, Y, and Z values as coordinates inside each sector. The center of each sector box is 0 X,0 Y, and 0 Z, left of center will be -X, 0 Y, 0 Z, right of center will be +X, 0 Y, 0 Z. In the TOP VIEW mode (the default mode when opening the Nav console), up from center on the map will be 0 X, 0 Y, +Z, down from center will be 0 X, 0 Y, -Z. So the far left of the sector will be at -100000 X and the far right of the sector will be at 100000 X (200,000 units total with a range of 0 to -/+100,000 units in any direction from coordinates 0,0,0). The Y coordinate is the 'height' position and you can adjust that with the REAR VIEW option. When the TOP VIEW is displayed, a green arrow will indicate your current position in the sector box and it will point in the direction you are heading. The image below explains the in-sector coordinate system: 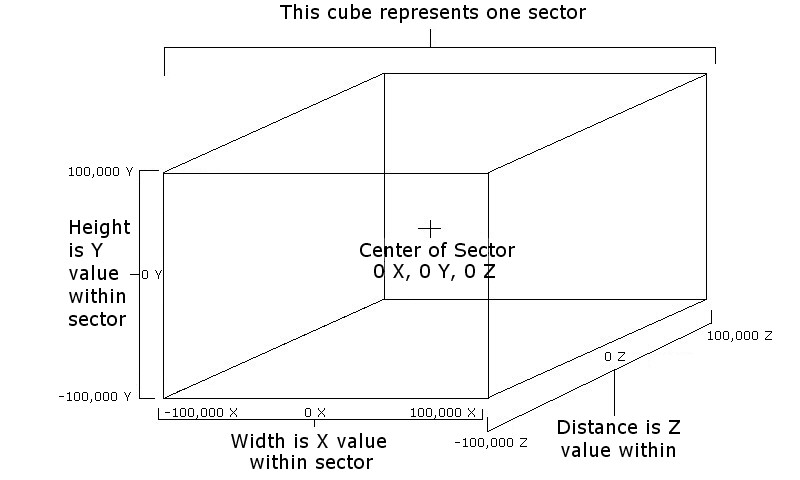 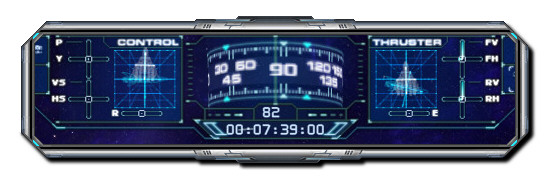 Your direction is displayed on the compass at the top of the screen. 0, or virtual 'North', is moving forward/positive on the Z axis. 180 is moving backwards/negative on the Z axis. 90 and 270 are negative and positive on the X axis respectively. Pitch determines your direction on the Y axis, below 0 is negative, above is positive. Pitch is indicated by the ladder displayed with the gunsight in the middle of the screen. You can manually enter coordinates by clicking on one of the coordinate values listed under 'Destination Position' or use the pointer to select coordinates by clicking on a point on the map. To mark important location on a map, click on ADD TO LOG, the current nav point on the map will be saved and you'll be prompted to enter a text description for the entry. Click on MAP LOG to view the list of locations you've saved. Clicking on the arrows to the right of the list let you scroll through them or you can use the mouse wheel when the pointer is over the list to scroll through them. Click on en entry to set the destination position to the point listed. You can also optionally right click on an entry to delete it from the map log. Click on NAV MAP to close the map log and return to the navigation map. The navigation map system shows both charted and sensor detectable objects in space. What is contained in the navigation system's map database is displayed as the base layer of the map in the console. This includes known charted objects such as stars, planets, moons, asteroid fields, black holes, and nebula clouds. Since these objects generally always exist, they can also be displayed remotely when called up on the quadrant map (by right clicking on a charted system). The map system will only display objects within nav sensor range. So if you exceed that limit, the sectors will be blank. When you zoom in on a system from the quadrant map, the map will only display charted objects within that area, again within the nav sensor limit. For locating objects in uncharted space and/or outside the nav sensor range, you will need to explore by travelling to such locations and scan for objects in range. Detectable objects are also displayed and their icons will be visible on the nav map once in sensor range. However, planet cities generally won't appear on the nav map until you are in the same sector. Cities are generally masked from long range nav sensor detection by planet atmospheres and other interference. Space station command modules can generally be detected several sectors away. If there is a station command module you want to keep track of for visiting later, you can also place a map log marker at its location. Detectable objects displayed on the nav map by sensors may change over time due to movement or destruction, so an object that is there one time may not be the next time you visit. You'll generally always need to return to the area to rescan for detectable objects to retrieve the latest details on the map for that sector/area. Detectable objects can also include ships and cargo containers when a sensor array is deployed or when you are in multiplayer and other players linked to the same faction are in the same sector you are. Deployed modules can also be detected by nav sensors. Such objects will display much smaller blips on the nav map. Some objects in space will broadcast precise coordinate data to your nav sensor system. Such objects include allied spacecraft and deployed modules. For allied spacecraft, they will broadcast an encrypted transponder signal that only other allied ships in the same sector can detect. For deployed modules, a generic transponder signal is broadcasted that any ship can detect and lock on to. With such precise navigation data being broadcasted, you can right click on any dots displayed on the nav map for those objects to plot a precise nav point to their location. When you hold the mouse pointer over a object's nav map blip that is broadcasting location data, the object's description and its exact locations will be displayed at the bottom of the nav map. This will indicate whether you can plot a precise nav point to that object by right clicking on its corresponding blip. Objects that do not broadcast such navigation data will not have location details appear when you hold the mouse pointer over their nav map blip. Such objects include cargo containers, shipwrecks, data drives, and hostile ships (which broadcast signals to mask their location). Although you can pick up a signal for such objects with a sensor station, you won't be able to plot a precise nav point to their location. Instead, you must plot a nav point near their location and then hunt for them using visual detection and radar to locate their positions. Once you select a destination position, a yellow X will mark the spot on the map and your radar will indicate the direction you need to turn to face the point you selected. You can select points in either the current sector box you are in or you can zoom out to select a point in a nearby sector box. To zoom in and out on the map, use either the mouse wheel or the ZOOM IN/OUT options on the right side of the console display under 'Map Controls'. When zooming in on a sector, the navigation system will center itself to the sector you have highlighted with the mouse pointer. Or if you click on the ZOOM IN button, the system will zoom in on the sector in the middle of the map automatically. You can also zoom in on a nearby sector box by right mouse clicking anywhere in a sector box. The navigation system will always auto-center the map to the center sector when zooming out. Blue arrows are available at each edge of the map that you can use to scroll the map one sector at a time. Once you have zoomed in on a sector, you can select a navigation point directly to an object in the selected sector by right clicking on its icon on the map. This option will set the X, Y, and Z position to the object for you automatically. Obviously, you'll want to avoid jumping directly into a planet or moon, so you'll want to manually fine tune your jump point to avoid colliding into certain objects. Right clicking on a station will automatically set your jump point to the docking hangar of the station. Since stations have five entrances, you will need to adjust your ship's heading to correspond with the angle of one of the entrances. See the 'Landing and Docking' section below for more details. Once you select a navigation point, you can quickly jump to the point you selected by pressing the default F8 key or clicking on LAUNCH. Upgrade your Fulcrum jump drive to travel farther with each jump. In addition to your navigation console and jump drive to travel from sector to sector, you can also fly through gates which are linked together to form a network that connects the various charted systems of the Evochron quadrant. Simply hold the mouse pointer over a gate's icon on the nav map when zoomed in to view its destination sector at the bottom of the nav map. The quadrant map (reviewed below) provides the gate coordinates for each system and indicates which systems are connected to each other with white lines. Also, keep in mind that selecting a jump/navigation point by left clicking on the nav map only sets the X and Z coordinates, since the map displays data in 2 dimensions by default. So if an object is above or below the arrival position vertically, you may need to adjust the Y coordinate value to fine tune your jump destination. To select a Y position, click on REAR VIEW to view the map from behind, or click on the 'Y:' entry box at the top of the display under 'Destination Position' and manually enter a value. The navigation system will place you at a distance from your arrival point so that as your speed decreases to standard cruise levels, you will gradually approach the position you selected. Your jump drive can also be used for directional travel in addition to precise coordinate navigation. This method is not generally recommended unless you need to make a quick escape or travel long distances. Some jump drives will be able to let you travel farther than your navigation sensor range, making such jumps much more risky if you don't know where you are jumping to. To activate the direction mode, press the default Alt-F8 key combination. The computer will calculate the maximum possible sector-to-sector distance you can travel, then set the sector coordinates to that location. The computer will place the in-sector jump point to the same XYZ location you had originally entered. So the destination waypoint may not always appear directly ahead of you, but setting the destination this way gives you more control over the jump point/direction. You can fine tune your jump direction by entering or clicking on a different XYZ location. It will take some practice to become skilled with this technique, but it can be a very useful time saving option. The AUTOPILOT option is available to the left of the map under the 'Waypoint(s)' heading which lets the computer fly your ship to a selected destination position at cruise speed. The default Alt-F key combination will also activate the AUTOPILOT mode. You can also activate the autopilot with the HUD option when the navigation console is not open. You can change your destination position between jumps with the AUTOPILOT active to plot a course around a planet or other object in space. Click on PING button under the 'Waypoint(s)' heading to broadcast your position to other ships in the area using a visual marker on the nav map. This can be useful in multiplayer when you want to locate other members of your faction that are in the same sector. However, use this option carefully as it is an open broadcast, so all other players in the same sector will see your position appear on their nav map as a green box. Click on SET LOC button to set the destination position to your current location. Below the 'Waypoint(s)' menu on the left side of the console is the 'Local Pts' menu. The heading stands for 'Local Points' and the menu provides shortcut click options for detectable objects in the sector. By clicking on one of the listed objects, the destination position will be set to that's object's location or near it. If the object is a planet, the destination position will be set in the direction of the planet, but not close enough to collide with it or burn up in the atmosphere. For most object types though, the destination position will be placed directly to the object's location. Below the 'Local Pts' menu is the map position display which provides the location the mouse pointer is highlighting on the map. It includes the in-sector coordinates, sector coordinates, and range factor. This display will help you know exactly what destination position you are pointing to on the nav map. In addition to the ZOOM IN/OUT and REAR VIEW buttons under the 'Map Control' heading on the right side of the console, the navigation system also supports slide control, 3D, and map zooming. For slide control, click on the 'Slide Mode' button on the right side of the navigation console. When this mode is active, you can left click anywhere on the map, hold the mouse button down, then slide the map around to any location within sensor range. Release the mouse button to reset the pointer to a new location to continue scrolling the map. Once you locate a sector you want to plot navigation points to, make sure most of the sector is in view on the map, then click on the 'Select Mode' button to return to the selection map mode. The navigation system will automatically center the sector you selected on the map and activate the default map selection mode. A 3D mode is also available which will allow you to rotate the map and view details in a more 3 dimensional way. This can be useful to gauge elevation and distance. Like the slide mode option, you can click and hold the left mouse button on the nav map to pan it around. This mode also supports mouse wheel zoom control so you can view more sectors around the centered viewpoint. For improved legibility/visibility and more precise navigation/jump point plotting, you can also zoom in on the entire nav map. Click on the 'Zoom Map' button on the right side of the navigation console to increase the size of the map by roughly twice its normal size. When activated, the zoom mode will remove the navigation console frame and most of the control buttons to make room for the larger map. You can still select navigation/jump points and retrieve details about objects on the map while using this mode. The default text mode will display details about an object when you hold the mouse pointer over its corresponding icon on the nav map. You must be zoomed in on a sector to view an icon's details (remember that right click lets you zoom in on nearby sectors). Click on TEXT ON to display text details for all nearby objects on the map. In this mode, location details about the object are displayed below each object's icon. Some of the text may overlap, making it difficult to read, especially when zoomed out. To reduce this problem, you can click on the text mode button (default setting is 'All' on the button) to display text for specific object categories only. The 'Zoom Map' option can also be used to increase the size of the map for improved legibility. The Quadrant map mode lets you view all of the charted systems in the Evochron quadrant. In the Quadrant map mode, you can also view the territory and technology maps. The territory map gives you the status of Alliance and Federation territory conditions in 500X500 sector sections of the quadrant while the technology map displays the economic level of each of the 500X500 sector sections. If you hold the mouse pointer over a displayed system, its territory and economic status will be displayed at the bottom of the map. You can left click anywhere on the quadrant map to plot sector coordinates to a location. You can also right click on a displayed system to view object details remotely and switch to the local nav map mode. The Quadrant map can also use the zoom map option. The TRANS POS button lets you broadcast your position to other ships with a text message (including to other players in multiplayer). Using the Navigation system will take some practice, so you may want to spend some time and fuel to practice using it in the system you start in before traveling to other systems. 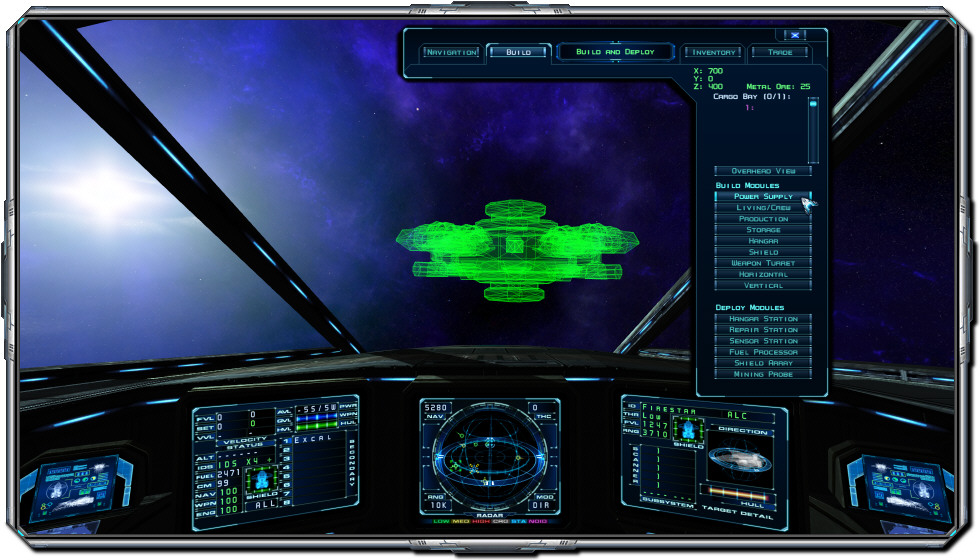 Each structure type (also referred to as a 'module) requires a certain quantity of metal ore to be loaded in your ship's cargo bay before you can construct it. To view the build conditions for a module, simply hold the mouse pointer over its corresponding button in the console menu on the right side. The build location and required metal ore are displayed in green near the top right of the console. A placement indicator will also be displayed out ahead of your ship showing where the structure will be constructed. The indicator will move in 50X50 coordinate unit sections in the direction your ship's nose is pointing. This way, you can gauge where a structure will be placed before constructing it. If the structure can be built at the current highlighted location, the placement indicator will appear either yellow or green and be displayed in the shape of the selected structure. If the highlighted location is not compatible for building, it will appear red. Green indicates an ideal build location. Below the build point location coordinates and metal ore requirements is the list of items in your ship's cargo bay. A scroll bar is provided on the right side to view all of the cargo bays on your ship, if your configuration has more than five installed cargo bays. Below the cargo bay list is the 'Overhead View' button which lets you view the entire available build area from an overhead perspective. When the overhead view is active, you can select any build point within range by moving the mouse pointer to the desired location within the grid that is displayed. Then simply left click to lock in the position you want to build at. When a build point is locked, the phrase 'Build Point Locked' will appear at the top of the console. Once a build point is locked, you can click on one of the module buttons to being construction at the point you selected. To unlock the build point, simply right click anywhere on the overhead view grid. You can then move the build point to a new location as desired. The overhead view mode also provides a 3D panning view mode which lets you pan around the build area for alignment and precision. To enable the 3D panning mode, simply hold the right mouse button down while moving the mouse around. If you have locked a build point, the lock will remain active so you can quickly gauge the exact placement of the point you selected in 3D. If you do not pan the camera around and just click and release the right mouse button, the build point will be unlocked. To return to the default cockpit view mode, simply click on the 'Cockpit View' button. Space station command and power modules will generally display green placement indicators even if no other modules are nearby since they don't really have dependencies with other modules as they carry their own power supplies and internal operational capabilities. Other modules often perform best when built closer together, so their indicators will generally display yellow in open space until they are near a connecting point with another module. You can still build these modules in open space, but may want to connect them together for optimal space management around shield and power modules. By building closer together, you can fit more modules in range of power and shield modules, resulting in a more efficient design. As long as the build point indicators display yellow or green, you can construct a module at that location and the game gives you the freedom to design your module layouts as you might prefer. If the build point is obstructed or unavailable due to incompatible environmental factors, the location indicator will display red and you won't be able to build there. If you are carrying sufficient metal ore to build the highlighted structure, click on the structure's button to begin constructing it. The construction process will take several seconds and involves energy beams that pan back and forth to put the structure together on a molecular level using the metal ore from your cargo bay. Once the build process is finished, the structure will be activated. If the structure is a station module or city building, its lights will come on if a power module is close enough to supply it with energy. Likewise, if a shield module is close enough, the structure will also be protected by shield arrays. Power modules and shield modules generally need to be within 500 build units of measurement in order for them to operate with other nearby modules. City building modules have many of the same design principles as space station modules. They use very similar designs, but include added structures designed for construction on the surface of planet terrain. The modules function much the same way as they do in open space, but their build location system, proximity factors, and certain functional elements do have differences. First, the build location system is based on angles rather than open space coordinates. Angles are used to accommodate the curvature of planet surfaces. City structures you build will be installed onto the terrain's surface and will rotate along with the planet. So a city you build won't remain stationary, it will become part of the planet's normal rotation and encounter its day/night cycles as well as any varying weather conditions that may apply from time to time. City buildings don't have the same kind of optimal build point dependencies as space station modules do. As long as you build them close enough, they'll be connected together for power and shield benefits. Cities do have the drawback of being limited to a fairly limited 2D range of vertical placement relative to the planet while space station modules can be built using diverse vertical positions. But cities also have the benefits of added protection from atmospheres and shifting location due to planet rotation, requiring any attacking force to slow their advance by requiring lower speed descents and careful jump point placement, which gives any defense force more potential time to respond and protect. Weapon modules are also different for cities than for space stations. While space station weapon modules use a two turret system to protect in most directions (as threats can come from above or below), city weapon modules use an elevated tower with a single turret system on top to primarily protect around and above their locations. Another difference involves the command module. For space station command modules, the structure is very large and requires a high quantity of metal ore to build. The space design is a more enclosed structure with 5 entrances around the center docking area. Only one of these can be built in each sector, so their build cap is more limited than for cities. City command modules are smaller and require less metal ore to construct. They are a more open elevated platform design that can be approached from above using just about any angle. Players can build a few of these on each planet, so they aren't as limited in their build cap as space station command modules are. However, they do not have the capacity for storage hangars, so only shipyard, engineering lab, and weapon lab options are available in these modules. City command modules are linked to the faction of a space station command module in the same sector, if one is present. Planetary cities are dependent on support from local resources and ships travelling in the area. Without the support of a linked space station command module for inventory and supplies, they must operate entirely on their own with any resources and support they can find. So by default, any city modules are neutral in their faction affiliation until linked with a space station command module in the same sector. If no space station command module is present in the sector, city command modules will default to an 'IMG' (Independent Mercenary Guild) faction ID, which designates a neutral affiliation. Such neutral cities will allow any ship to dock with them and conduct business. Once a space station command module is constructed in a sector, then any local cities in the same sector will align their faction affiliation with the station's. This way, you can take over existing cities in a sector by destroying a linked space station command module, then building one of your own for your faction in the same sector. Deployable modules are temporary structures designed to provide short term options and benefits. A station hangar deployable module lets the player save their progress out in open space without requiring them to be docked at a full build module station hangar. This lets the player save their progress without the fuel penalty associated with saving in open space without a hangar station. The hangar station will provide the resources needed to engage the ship's cryo function. A repair station lets a ship repair its hull and subsystem damage quickly and without the need for a repair equipment device, repair beam, or a space station hangar build module (and its required cost for repairs). A sensor station provides a remote way to scan a large region of a sector's space. This can be useful for locating other ships, containers, or certain other miscellaneous objects. They must be placed with +/- 50K of a sector's central location. A fuel station can harvest particles from a nearby star or nebula cloud and convert them into fuel for your ship. A shield array can protect a small section of space from weapon fire, which can be helpful when threats are nearby and you are trying to retrieve or mine something. A mining probe can automatically mine material from asteroids and planets. They can allow you to complete other objectives while they work to mine. Once the mining probe reaches capacity, it delivers the material it retrieved into cargo containers near the deployed location where you can later pick them up. If you abandon them (for example, by leaving the sector), they may be picked up by someone else, so it's important to retrieve them quickly. Deploying operates much like building. Both options use the same grid based placement system. However, there are more locations where you can deploy modules since there are fewer restrictions for most deploy options. However, mining probes require specific locations for them to be deployed. They must be deployed in an asteroid, cave, or on a planet or moon. Most of the time, you can place the build marker under terrain to deploy them. To deploy a mining probe in an asteroid though, you'll need to use the overhead view mode, lock a build point near an asteroid, then click on the 'Mining Probe' button. When you do this, the placement system will automatically put the mining probe in the asteroid that is closest to the build point you locked. Build modules can only be destroyed by weapon fire. Deploy modules can quickly be destroyed after construction by flying close to them and clicking on the option that appears on the HUD to scuttle them. They can also be destroyed by abandoning them and leaving the sector. 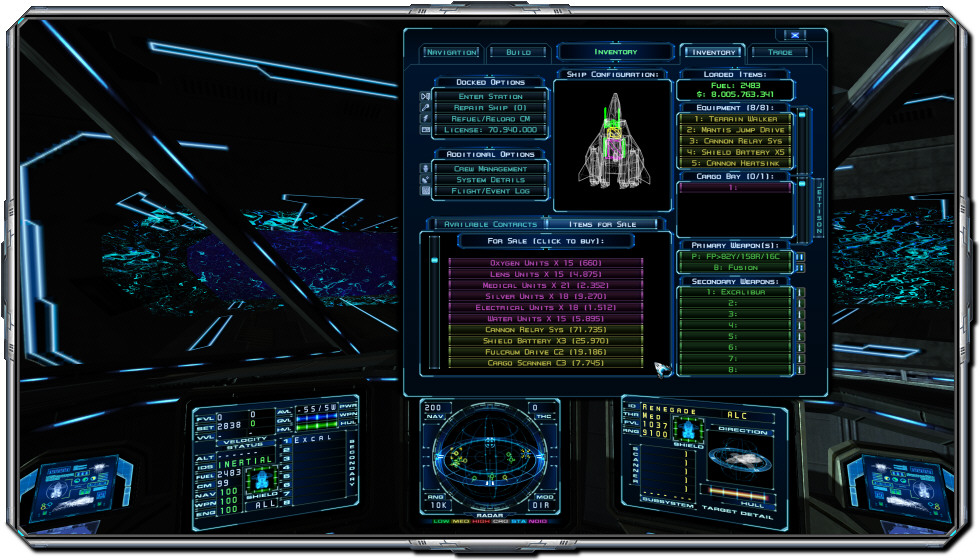 If your ship can store or load the equipment/commodity item you want, it will be loaded and the cost deducted from your account. Each item will be automatically routed to the default compatible installation option. Commodities will be loaded into your ship's cargo bay while equipment and weapons will be installed onto compatible hardpoints. Right clicking on an item provides alternate functions for buying, selling, and installation. To load upgrades, weapons, and equipment into your cargo bay instead of installing them on your ship, right mouse click on the item(s) you want instead of left clicking on them. This way, you can use your cargo bay as a storage point for items other than commodities. You can later install desired items in your cargo bay onto your ship by right clicking on them from your cargo bay list (you must be docked at a station, city, or carrier to install items from your cargo bay onto your ship). Likewise, you can transfer installed items on your ship to your cargo bay by right clicking on them instead of left clicking on them. If you only want to buy or sell one unit of a commodity at a time, simply right click on the listed commodity. To consolidate commodity cargo, dock at a station or city and use the ALT key with either the left or right mouse button. Left click to combine matching commodities up to the limit of 25 per cargo bay. Right click to transfer one unit at a time. The inventory console also lets you refuel, repair, review available contracts (see the Accepting a Contract section below for more details), manage crew members, review the flight log, access system details, or enter a station, city, or carrier. If you buy fuel, your countermeasures will also be refilled free of charge. A description of items you highlight with the mouse pointer is provided at the top middle of the console display. Most of the descriptions are self-explanatory, but when you highlight a weapon, the Y: stands for Yield, S: stands for Speed, C: stands for Cycle rate, and R: stands for Range. Once you enter a station, city, or carrier, you can access the shipyard. See the Shipyard section above for more information on using the shipyard. For cities and stations, the engineering lab is also available and lets you construct various equipment items from raw materials. See the Engineering Lab section for details. You can also access the weapon lab while at cities and stations, which lets you design and build custom weapons for a small fee. See the Weapon Lab section for details. The inventory console also provides the crew management console. If you are piloting a civilian ship, you can further enhance the design parameters of your ship with crew members. Crew members can be hired for various roles and you need to pay them based on their loyalty, trade, and skill. The fair wage for each crew member is displayed in the crew management console. If you pay them less than the fair wage indicated, their loyalty to you will likely drop, which increases the chance they will leave your ship. Pay them well and their loyalty will increase. The longer you keep your crew, the more loyal and skilled they will become, which also increases the amount of credits they expect to be paid. Checking and adjusting your crew's pay levels each time you dock is a good habit to get into for improving loyalty. Your crew's loyalty will also increase if you successfully complete contract objectives and their loyalty will decrease if you fail contract objectives. You can also change the position of a crew member in the list to the top slot by holding the ALT key down and then clicking on the 'Top' button next to their listing. The system details option is also available in the main inventory console display. System details will provide details on market conditions and other local information specific to the system you are in. Your statistics are also displayed at the lower right while market prices for commodities and fuel are displayed in the two lower columns on the left. The 'System Information' option gives you a brief overview of the statistics for the system you are in as well as details on the nearest planet. The flight log stores event information in a chronological list that can be displayed and managed by category. You can display each category by clicking on its button. All will display every event in the flight log, Contract will display only contract events, Event will display general events, Buy will display events where you purchased something, Sell will display events where you sold something, and Data will display entries related to data you received. You can delete the current selected category with the Delete Category button. Items you have installed onto your ship or contained in its cargo bay are displayed on the right side of the console under the 'Loaded Items' heading. The amount of fuel you have and how many credits your account has are displayed at the top. The menu below the fuel and credits indicators lists your ship's currently installed equipment. For the list of equipment installed on your ship, you can use the slider bar on the right side of the list to scroll through all installed items, if your ship has more than 5 equipment slots. You can also hold the mouse pointer over the list and use the mouse wheel to scroll, just like the items for sale list. The next menu on the right side displays your ship's cargo bay contents. Scroll options are also available for this menu in case you have more than 5 cargo bays available on your ship. There is also a 'Jettison' button on the right side of the menu that lets you drop all of the cargo from your ship at once. You can also optionally discard cargo by simply double clicking on the item or material you want to get right of while in open space. Weapons are listed next and include any installed particle or beam cannons first under the 'Primary Weapon(s)' heading. Secondary weapons are listed next and the weapon in the number one slot is the one that's ready to fire next. The inventory console will automatically open when you enter a space station hangar or land on a city landing platform. When the inventory console opens, the hangar's tractor beam will engage and hold you in place until you close the console. You can disable automatic inventory console control by pressing the default Alt-F3 combination You will then need to manually open the console when you dock to engage the hangar's tractor beam and access docked options available in the inventory console. You can also open the inventory console while inside a carrier hangar for access to military spacecraft and weapon supplies. 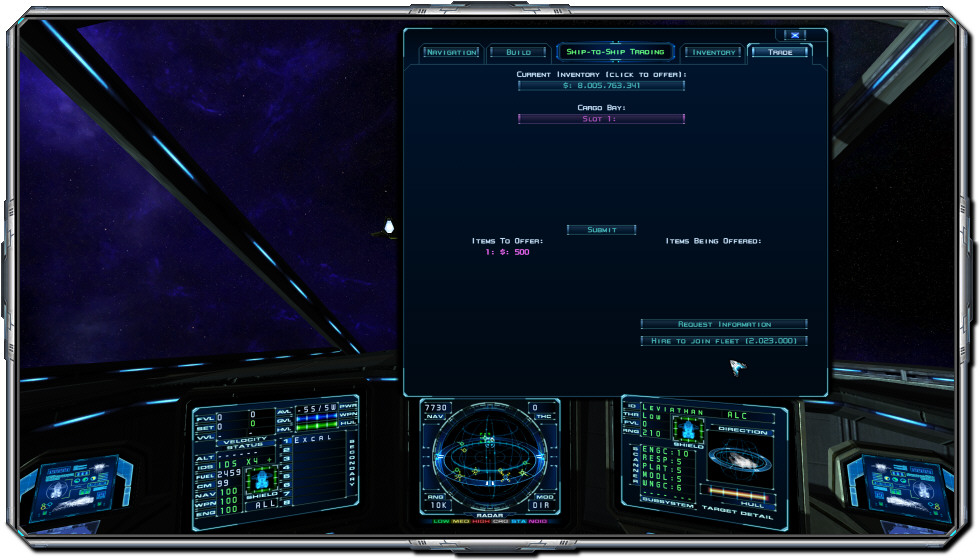 The trade console also includes options to hire a ship to join your fleet (single player) and request information. Hiring a ship to join your fleet can be useful in combat situations when you may need additional reinforcements or for escort protection when transporting items in hostile space. The request information option can provide you with helpful tips from other pilots in the area. They may give you suggestions, warnings, or just send you comments. On occasion, they may also be willing to provide you with secrets they've discovered or contraband for a price. They may also offer build tips for the engineering lab. When a tip is provided, the details are stored in both the flight log and engineering lab build templates list. If no space is available in the template list, the data will be stored in the flight log only. In multiplayer, you can also hire another player to complete an objective for you in the trade console. Click on the 'Arrange Contract' button to select optional objectives. You can hire another player to destroy a ship piloted by another human player, destroy a certain number of hostiles, or recover material for you. Once both players agree to the terms, the player who wants to be paid for the contract must click on 'Accept'. If the objective is completed, the selected number of credits will be transferred from the hiring player to the hired player and both will auto-save. If either player is destroyed, the contract link will be terminated. Either player can also cancel the contract. Pilots can also exchange small 30 unit fuel pods in multiplayer as well as challenge each other to races using the trade console. When a race challenge is submitted and accepted, the race course is placed in front of the player who sent the challenge at a heading of 0. You can also link with another player as a gun turret operator for their ship. Simply click on the CONNECT GUNNER BINDING button in the trade console to activate. You will then be in control of a ball turret that surrounds the ship you've linked to while the receiving player will continue to be the pilot of their ship. Either you or the pilot player can click on the DISCONNECT GUNNER BINDING option to terminate the gun turret mode. When that happens, or if the pilot ship leaves the sector, you will be returned to your ship. 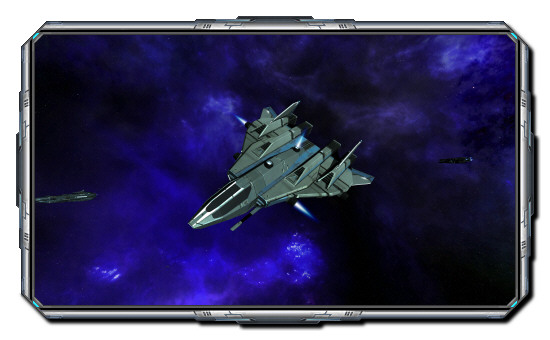
Your ship is controlled by 4 main engine outlets and 8 maneuvering thrusters mounted on the hull. All of them are managed by an inertial dampening system (IDS) to help simplify the complexities of space flight. The IDS computer will automatically activate each thruster as needed and modulate the control to keep the ship moving in the direction it is facing. Sharper turns at higher speeds will require longer adjustments before the ship's course is adjusted for a new heading. If you want to bypass the system at any point, simply press the inertial system on/off key (default space bar). You will then continue in the last direction you were headed until you re-engage the system or manually alter course using the maneuvering thruster controls. For main engine control, the IDS throttle scale is also adjustable and the current scale factor is displayed next to the 'IDS' indicator on your ship's status display (ranging from X1 to X9). 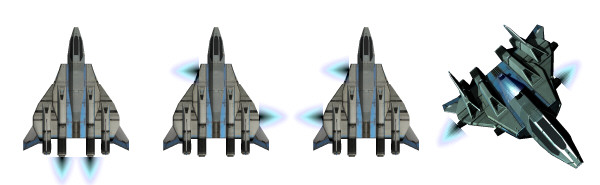 When the IDS is off, you can manually control each thruster. This can be helpful in combat when you want to drift/slide while firing at a target. High speed drifting can make you a hard target to hit. Evochron Legacy lets you control all maneuvering thrusters variably, if the control device you are using supports enough axis channels to take advantage of that option. When performing maneuvers, you will need to plan your course objective in advance, to avoid sliding into objects in space or reducing your speed to low levels that could potentially make you more vulnerable. The engine outlets provide main thrust for moving forward and in reverse while the maneuvering thrusters provide rotational and strafe control. The engines offer two modes of power, cruise (also referred to as 'military burn') and afterburner. At cruise, the engines will provide a similar level of thrust as the maneuvering thrusters and offer the most fuel efficient maneuvering mode. At afterburner, the engines will burn a lot of fuel in exchange for rapid acceleration and deceleration. For civilian spacecraft, the performance of the maneuvering thrusters is determined by the wing and thruster set you select in the shipyard. For military spacecraft, their wing and thruster configurations are fixed. 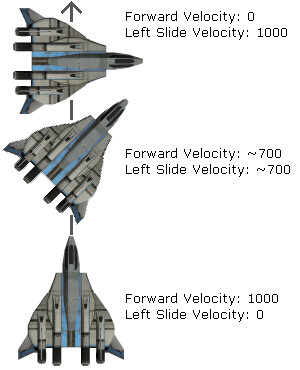 In space, there is no atmosphere to provide lift, friction, and drag. An object can simply drift indefinitely once speed is imparted to it. If a ship is travelling forward and turns right 90 degrees, it will still drift in the original direction it was headed due to inertia. If its original forward velocity was 1000 MPS, it will be drifting to the left at about 1000 MPS when it turns right 90 degrees and its forward velocity will drop to 0. 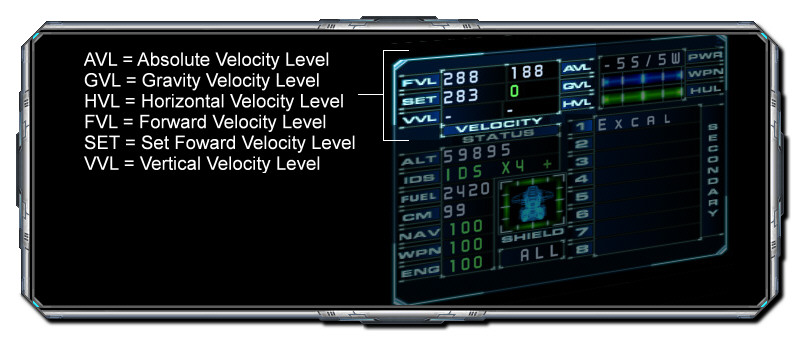 Your spacecraft is equipped with six velocity gauges to help you monitor your ship's movement. The 'SET' velocity and 'FVL' or Forward Velocity Level gauges keep track of your ship's applied velocity level relative to other factors that may apply. For example, if you are in a planet atmosphere and set your velocity to 500, your IDS will apply enough engine thrust to achieve that level of velocity subject to the rotation and gravity forces of the planet. Your indicated 'FVL' forward velocity level will read 500 to match the 500 'SET' velocity you selected, but your actual velocity relative to the universe will obviously be different because you are above a planet that is rotating, which is carrying you along with it. So depending on your ship's orientation, your actual overall absolute velocity level ('AVL') relative to the galactic constant (ie your position in the galaxy) might be slightly above or below your local 'FVL' indicated velocity due to the rotation of the planet. If you fly against the direction of the planet's rotation, your overall absolute velocity level will be lower than your local forward velocity level. If you fly with the direction of the planet's rotation, your overall absolute velocity level will be higher than your local forward velocity level. The 'HVL' and 'VVL' gauges provide the horizontal and vertical velocity levels your ship is travelling at, relative to its current orientation. This lets you know how fast your ship is drifting in one direction or the other sideways or up and down. The gauges include an arrow pointer to indicate the direction of drift and will also account for any gravitational offsets in the same way the 'FVL' indicators does. As mentioned above, the 'AVL', or absolute velocity level, gauge provides your ship's velocity relative to your position in the galaxy, rather than relative to any local gravitational/atmospheric conditions. Most of the time in open space, this indicator's value will remain pretty close to the local forward velocity level indicator's value. However, once you enter a gravity field, you may see these two values differ significantly. For example, if you are flying directly toward a star with the IDS on, your ship will work to match your local forward velocity level with the set velocity you select. Both your set velocity and the local forward velocity level indicators might read something like 700, but as you approach the star and the star's gravity increases its pull on your ship, you'll see your absolute velocity level indicator increase to a value above 700 as you are gradually pulled in by the star's gravity to a faster overall velocity. If you disengage the IDS, then your ship's computer will stop trying to maintain your ship's relative velocity and your local forward velocity level will also start to increase as the force of gravity is then allowed to accelerate your ship unrestricted by computer offset control, resulting in even faster velocity acceleration. If your ship is being pulled at an indirect angle by gravity, you'll see your 'HVL' horizontal and/or 'VVL' vertical velocity level gauges change value as well. If you turn directly away from the star and engage the IDS, your ship's computer will work to return your local velocity to the selected 'SET' level, but your overall absolute velocity level will then be slower since gravity will continue to pull you backward toward the star. To escape the star's gravity hold, you'll need to accelerate to a velocity that is higher than what the force of gravity is pulling you in by. The 'GVL', or gravity velocity level, gauge will help you determine how much of an effect gravity is having on your ship's trajectory. The gravity gauge displays the level of velocity your ship is being pulled in by, it is not a force factor indicator. So if your gravity gauge reads 500, you can maintain a fixed location by turning away from the object generating the gravity and setting your local forward velocity level to 500. Select a faster velocity to pull away from the object generating the gravity. The IDS system isn't always able to compensate for strong gravity fields, so you may need to engage the main engine and/or maintain a certain velocity to navigate through such gravitational forces. Maintaining moderate forward velocity is especially important in planetary atmospheres where flying too slowly can result in flight instability and dangerous drops in altitude. The ships in Evochron Legacy are optimized for space flight and don't handle very well in planet atmospheres. Avoid making rapid maneuvers which can result in loss of speed and keep your altitude high until you're close to a docking station. You'll want to be ready to escape back into space if attacked. You may want to spend some time practicing both space flight and atmospheric flight while you're still in the system you start in where there aren't any hostile ships. Using all of these velocity indicators will help you maintain situational awareness of how fast your ship is flying and in what direction(s) while also indicating the effects any environmental conditions around you may be having on your ship. This will help give you the ability to formulate flight paths to perform maneuvers and stay safe in dangerous high gravity/atmospheric environments. At times, you may want to level your spacecraft with the galactic ecliptic for docking maneuvers or for other purposes. The default right control key will auto-level your ship for you. Simply press and hold the key until your ship is level, then release the key to resume manual flight control. In planet atmospheres, the system will level your ship relative to your position over the planet, incuding both the pitch and roll axis to align with the horizon. 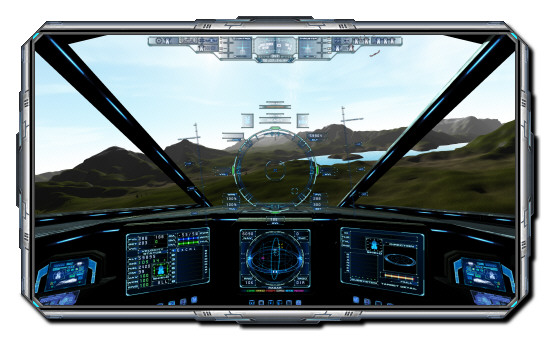
To get access to a system's available inventory, you will need to land on a planet or dock with a space station. Each planet and station can have its own unique inventory and in multiplayer, individual players can be offered a unique set of items and/or prices not available to others depending on the status of the player. Planet's and stations are indicated on your navigation map, look for a large sphere or a gray station symbol and hold the mouse pointer over the icons for coordinates to guide you to where you need to go. To land on a planet, slow to around 3000 MPS before you enter the atmosphere and watch for guide boxes to appear that will help you determine a safe descent path to the planet's nearest city the navigation system is tracking. Try to remain at a high altitude until you get close to the city so you have a quick escape if you are attacked while descending. Otherwise, you risk being stuck in an atmosphere environment that makes it difficult to evade an attacker. If you haven't yet reached a close distance to the city, the descent guide boxes will remain red in color and will provide you with a high path to reach the city. Once in a close proximity, the guide boxes will change to green and will point directly to the docking platform. Fly to the top of the docking platform and the platform's tractor beam will secure your ship and open the inventory console automatically. A flashing docking light will be visible to help guide you to the docking platform. Reduce throttle to 0 to avoid wasting fuel. When you're ready to leave, press the default F3 key to close the inventory console and instruct the docking tractor beam to disengage. Add throttle to safely depart the docking platform and climb back into space. 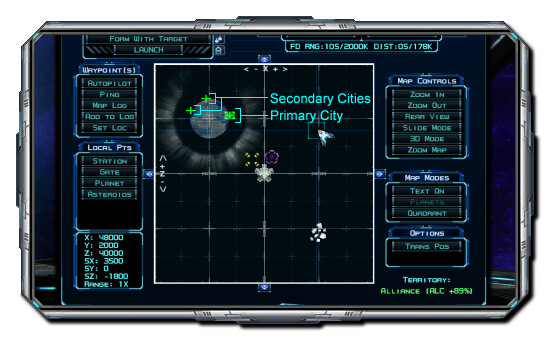 To aid in planet descent navigation, your navigation map will provide a green '+' symbol highlighted with a box to help guide you to the primary city. Other secondary cities will be indicated by just a green '+' symbol. The image above displays how these indicators appear on the nav map. There are often several cities on the surfaces of the planets in Evochron, which also offer docking/trade options. The guide boxes will switch to the nearest city if you approach one close enough, otherwise they will focus on the primary city. While in planet atmospheres, your inertial dampening system will attempt to keep you at a safe altitude, but won't be able to prevent high speed descents. Once your altitude drops to below about 5500, you will receive a vocal warning and alarm if your speed is high enough to risk damage upon crashing. Your inertial thrusters will engage at an altitude of about 2000-3000 to try and keep you from slamming into the ground. If your speed is low enough and you aren't flying too fast toward the ground, your inertial system will be able to safely hold you in place. You can also drop your throttle to 0 and hover in level flight, but this will burn fuel at a moderate rate. To mine a planet, descend to its surface and activate the mining beam when you are just above the terrain.  If you didn't find something you wanted at a planet, be sure to check nearby stations as well, if available, since each location will likely have different inventories of items to buy. To dock with a station, simply fly toward it. When you get close enough, a blue direction indicator will appear to help you visually spot the station. Stations and some other objects in space have their own gravity protection field to prevent ships from ramming into them. Your HUD will display a pathway that will help guide you to the docking area. The pathway will be red if your approach is outside of the required docking angle and it will be green when you are approaching correctly. Line up with the flashing docking lights to approach at the correct angle. The docking area on a station consists of a large hangar with five entrances facing 0, 72, 144, 216, and 288 degrees (that you can approach at headings 180, 252, 324, 36, and 108 on the compass). The IMG standarized this hangar design many years ago in order to provide enough entrances to sufficiently manage docking and departing traffic in a predictable pattern. The station's dock master will report to you the status of an entrance you are approaching or departing through and other ships in the area will also generally call out their docking/departing patterns to help guide you. While ships are shielded and generally protected from collisions, IMG regulations specify that approaches and departures should be managed carefully by all pilots to avoid interruptions and congestion. Once you reach the docking port, the station's tractor beam will engage and hold you in place and the inventory console will open, just like a planet's city. Turn off the inventory console to disengage the tractor beam and depart. If you still aren't able to find something you want to buy, you can also explore the system for a while to allow other ships to continue docking and trading items. After several ships dock and trade items with the planet and station, their inventory will eventually change and you can search again for new items. As trade events occur, item inventories and pricing will adapt. Your activities in a system can also effect the pricing on those items. Each planet and local economy can specialize in a particular industry. There are 5 sub categories and a general category. A general economy planet has a market structure that typically includes many different types of commodities and pricing is largely based on the overall economic conditions of the system. An agricultural economy creates an abundance of food, so the prices are generally very low for that commodity. An industrial economy will often pay a premium for raw metal ore and provide low prices for machined components. A technology economy will usually pay very little for electronic equipment, since they create most of what they need themselves, but will pay high prices for materials needed to produce them, including diamonds and platinum. A bio-research economy can be a good place to buy meds at low prices, then sell in other economies for profit. An energy economy can be a good place to buy hydrogen cells, solar cells, anti-matter cells, and fusion cells at low prices. The type of economy for each planet will be displayed after its name on the nav map, G is for a general economy, A for agricultural, I for industrial, T for technology, B for bio-research, and E for energy. Once you become somewhat wealthy, you might want to consider purchasing a station license. Once you buy a license, you can purchase any commodities you want from a station at a discount of 5%. You'll still have to pay full price for fuel, equipment, and weapons. Items you sell to the station will be sold at the reduced price. But getting commodities at a discount can provide a major financial benefit in the long run. You can cancel a license later, but the price you pay is not returned to you. Choose a station carefully when investing in a license, make sure it carries the commodities you will be most interested in and/or is in a location you need a safe docking point in. A station license will also reduce hangar transaction fees by 50%. Buying a station license will prompt you to save your progress to apply required changes to your profile.
To review contracts, dock at a station, city, or carrier. Some contracts will require you to be docked at a particular location before you can accept them and only military contracts will be offered when you are docked at a carrier. Once the inventory console is open, click on 'Available Contracts' is the option isn't already highlighted. Doing this will let you review the available contracts being offered from the location you are docked at. Each contract number within the total available will be displayed in the heading above the contract description. When you are not docked, only the total number of contracts available in the sector will be displayed in the header. If both a station and a carrier are present in the sector, then the total number of contracts available at the station will be displayed first follow by the total number of contracts available at the carrier. When you are docked and reviewing contracts, you can use the 'Previous' and 'Next' button to toggle through all of the available contracts. Click on the 'Accept' button to agree to the terms stated in a contract. Some contracts are time limited and must be accepted before time expires. If you accept a contract, a waypoint indicator will appear on your HUD, the radar, and on the navigation map. Fly to the indicator to begin the contract objectives. Use the jump drive to quickly travel to the waypoint. For some contracts, you may want to reposition the waypoint slightly to avoid colliding into a ship or other object when you arrive. For combat contracts requiring you to destroy capital ships, it is recommended that you travel to the destination quickly to avoid giving the ship time to get away or call in reinforcements. If you successfully complete the objective(s), you'll be paid immediately. Read the contract details carefully, you can sometimes just complete the main objective and still receive full pay. For example, if a contract only requires you to deliver some cargo to a waiting ship, you don't have to destroy any intercept ships. Simply fly to the waiting ship and stay inside the green guide box located below it, then double click on the item you need to deliver in your cargo bay list. You can also jettison your entire cargo bay, but make sure to sell off any other cargo you have before accepting the transport contract, otherwise the waiting ship will be happy to take whatever you jettison from your cargo bay without compensating you for it. The types of contracts you are offered will vary depending on the conditions of the region you are in. This includes environmental factors as well as the region control level. Region control levels are displayed in the lower right corner of the navigation console and values from 0 to 35% indicate disputed control levels, values from 35-100% indicate primary control values. Here is an image showing each level of region control and how the levels are divided between each category: 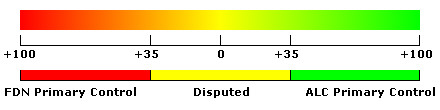
Emergency situations can occur in numerous locations throughout the game's universe. For example, a severe food shortage on a planet could result in a distress call that would pay very well for delivery of food units to that planet. A failed atmosphere processor can result in the emergency need of oxygen. A ship may run out of fuel and send out a distress call for rescue. When a distress call is received, details will be available in the list of contracts that are visible when you dock at a station. Distress calls are time limited, so you only have a limited amount time to accept the contract for the distress call before it either expires because it's too late to complete the objective or it is offered to another pilot. The accept time limit for the distress call will be displayed below the contract details.
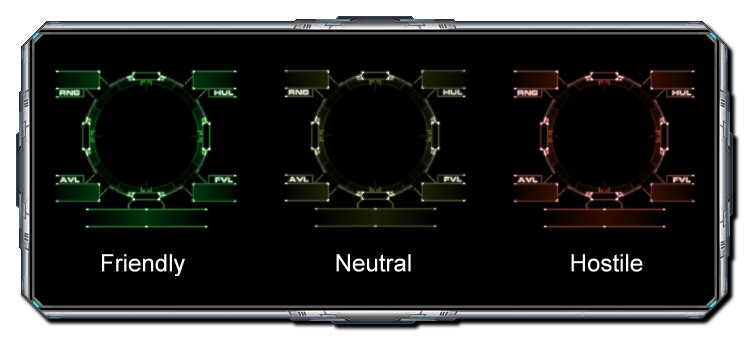 The threat level of every ship in range is color coded. Green level ships are friendly, yellow are moderate, and red are hostile. The threat level color system helps you determine how a particular ship will react to you. Green level ships usually agree to review trade offers and won't attack unless provoked. Yellow level ships may agree to trade offers, unless they are carrying something they don't want to sell. Yellow threat level ships are also much easier to provoke and may switch to hostile level threats quickly if you hit them with weapon fire. Red threat level ships are usually ready to attack you if not already engaging another ship. The target status display will also indicate if a targeted friendly ship is part of your fleet (single player) or a member of your faction. If the ship is part of your single player fleet, the letters 'FLT' will be displayed in the 'THR' line on the target detail display.
To target a ship, simply click on it with the mouse pointer when it's in your forward visual range. You can also use the T key to target the next ship in sequence or R to target the nearest ship. To target the next hostile ship, use ALT-T. To target the nearest hostile ship, use ALT-R. There are also optional dedicated key controls for targeting the next or nearest hostile ship (default keys are O and P respectively). To target a ships in your gunsight, press the default Y key. The target's damage, orientation, cargo (if your ship is equipped with a cargo scanner), velocity, and range will be indicated on the lower right cockpit display. The default target display mode shows the damage levels of the ship being tracked. Each of the ship's components will be colored coded based on levels of damage. If the component is gray, it has sustained little or no damage. If a component is yellow, it has sustained moderate damage and if it is red, it has sustained critical damage. You can press the default U key to target specific main subsystems and view the percentage of damage (see the Subsystem Damage and Targeting section below for more information). Press the default G key to switch to the list mode which displays up to 10 ships in the area sorted by distance. The ship you are currently tracking will be highlighted by brackets. Press the G key a second time to turn off the ship targeting display. The option to turn off ship targeting will provide a way to disengage your weapon locking systems, so no ships will be in danger of being fired upon due to a missile lock nor will the MDTS lock while in this mode. When you turn off the ship targeting display, the radar will enter a passive tracking mode that will let you know which ship will be targeted once the targeting display is turned back on. You can continue to select a new target while in the passive targeting mode, but it will only be indicated on the radar with brackets. You can turn the display back on in the target status mode by pressing the default G key a third time. When engaging a hostile ship in combat, keep an eye on the target status display and direction indicator. The shield array levels of your target are indicated in the middle of the target status display. The hull damage level of the target you are tracking is shown as a yellow bar at the lower right of the target status display. As your target takes damage, the yellow bar will reduce in size and a green bar will begin to appear behind it. The more green that is visible, the lower the hull level of your target. Once the target is destroyed, your HUD will automatically track the next closest ship. If there are hostiles in the area, the HUD will automatically track the next closest hostile ship. If you have a target scanner installed on your ship, details about the current targeted ship's component configuration will be displayed, once you are within the device's range. This information will be displayed in the 'Scanner' section of the target status display.
Primary weapons consist of particle cannons and beams cannons. Particle cannons fire high energy projecticles at high speed while beam cannons use powerful lasers. When you are in gun range, the target lead indicator will appear which will help you aim manually. When the lead indicator appears and the MDTS (multi-directional targeting system) is active, the target must be in the outer circle of your gunsight to automatically fire towards the lead indicator. The MDTS helps simplify aiming your guns at a moving target, although at greater ranges, its accuracy won't be as high since a target will be able to maneuver out of the way of your gunfire at longer distances. You can turn off the auto-aiming MDTS system if you want to try and aim your weapons manually. The weapon system will also fire beam weapons directly at the target if the MDTS is on. Since beam weapons move at the speed of light, they do not need to lead the target to hit it. However, they must 'harmonize' at the point of impact to inflict significant damage. Particle cannons include computerized accuracy control for projectile placement with or without the MDTS active. The system is designed to put the shots you fire directly at the point your gunsight or MDTS is aiming the moment you pull the trigger. The computer system includes auto-compensators that apply offset force factors to your shots to insure that they will reach the indicated point regardless of how fast your ship is flying, what angle it's at, and of any outside factors that would otherwise effect their path. So whether you are in a planet atmosphere, near a high gravity star, or in open space, when you pull the trigger your weapon system will apply directional and physics offsets to your shots to insure they reach the location your gunsight or MDTS is pointing to when you fire. This way, you can always aim directly at where you want to place your shots and let the computer do the work of sorting out any factors that may interfere with accuracy. So you do not need to worry about trying to manually compensate for drift vectors or environmental conditions, simply point at where you want to aim and fire. To obtain a missile lock, keep the target inside the outer gunsight boundary until the target box secures a lock. When you are within missile range and have acquired a missile lock, the indicator will switch to the target lock indicator (a rotating box will display around the target direction indicator). The distance the lock will be obtained will vary depending on which secondary weapons you are currently carrying. Once locked, the target can move anywhere in your forward visible range and still remain locked. If the target leaves your view or reaches a distance beyond your missile's range, the lock will be lost.
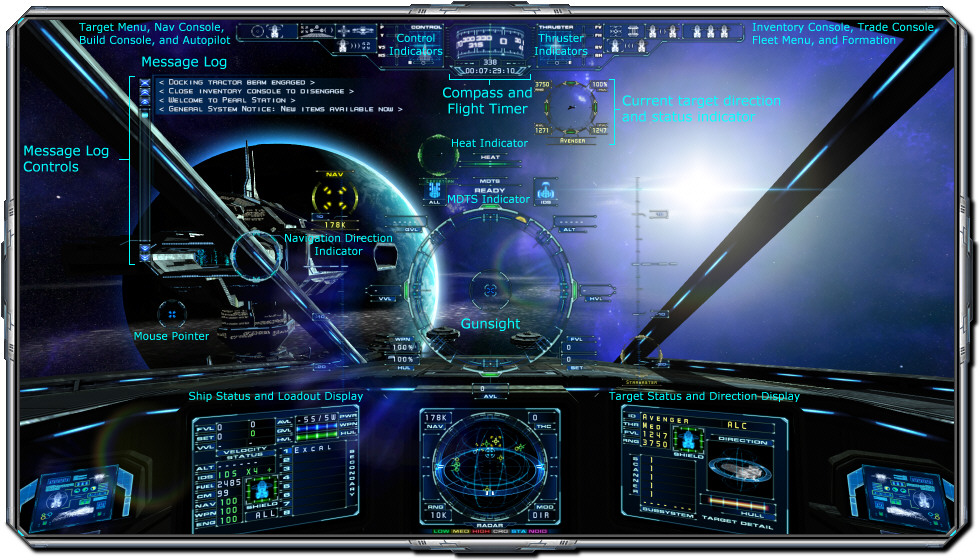 The radar (middle display in the cockpit) offers two primary display modes, 3D and 2D. When in 3D mode, the letters 'DIR' will appear in the mode indicator at the lower right of the radar display. When in 2D mode, the letters 'DIS' will appear in the mode indicator. The 3D mode is primarily for direction information while the 2D mode is primarily for distance information. You can toggle between the modes using the default Numpad + key. By default, the radar display shows information in 3D. To face a target or other indicated object, you must align the corresponding radar blip with the light blue brackets in the middle of the radar display. The ship you currently have targeted will have a highlight box around its corresponding radar blip. An object's range is displayed by the number of lines surrounding its dot. No lines indicate a distant object, one set of lines indicate a medium range object, while two sets of lines indicate a close range object. Radar blips are also color coded to indicate the threat levels of the nearby ships being tracked. When red blips appear on the radar, a warning sound will help bring the threat to your attention. Blue blips indicate stations, red blips with diagonal brackets indicate inbound missiles, white blips indicate nearby cargo, and purple blips indicate unknown or miscellaneous objects. In 3D mode, the blips include an attached line that points away from the center of the radar sphere, which helps you determine if an object is behind or ahead of you. Imagine viewing the combat area from above and slightly behind, that is the perspective of the radar. The radar's 2D mode displays radar contacts from an overhead perspective. It's best used when your ship is flying relatively level and provides more specific range information on various objects in the area versus the 3D radar mode. You can filter out radar contacts by range in either mode for a less cluttered view in crowded space or to prioritize close range targets only. Ranges are available in 2K intervals spanning 2K to 10K. You can togge between range modes using the default Numpad Enter key. Once you've learned how to interpret the radar screen, you will be able to quickly determine the exact direction a ship or object is at. When flying in space, it's important to maintain situation awareness and the radar combined with other information displayed on the HUD will provide the information you need to make good decisions. Learn to use the target display options and HUD directional indicators so you can make quick and effective decisions. Also, watch the vertical and horizontal speed indicators to monitor the level of sliding you are at. When performing turn and pitch changes, it takes time before your maneuvering thrusters can adjust your actual flight course to the direction you are facing. Watching the horizontal and vertical speed indicators along with visual awareness can help you prevent a slide into an asteroid or other ship. Looking around is an important aspect of staying aware of the situation around you. Even though the 3D radar provides instant direction information, quickly looking around can give you additional visual details on the heading and distance of ships around you. If you're not currently attacking a ship, it's a good time to look around a bit and make sure no ships are trying to sneak up behind you. Using the padlock view (default ALT-V) can help in visually keeping track of a target in your forward view. Using the manual cockpit view controls (with the Insert, Home, Page Up, and End keys or the joystick HAT if available) to look left, right, up, and behind are generally considered the best way to maintain situation awareness in combat. You can also pan around the cockpit using the ALT key in conjunction with each of the main view control keys (or with the joystick HAT when set to the 'Pan' mode), simply center the view to automatically return to looking directly ahead. Other important items to watch for on the HUD and cockpit displays include your warning indicators, energy and shield levels, speed, and target direction arrow. After a few flights, you should become familiar with the position of each of these items so you will be able to react accordingly. Keeping your shield levels high will help prevent specific system failures caused by direct hull impacts from enemy fire. You can also boost power to both main energy systems on your ship. Energy based weapons and your jump drive system share a common power source, boosting power to them provides faster recharging and lets you fire more rounds. Boosting power to your shield system will increase its ability to resist weapon impacts and improve its recharge time. Use the inbound missile direction and range indicators along with the 3D radar to track the range and direction of incoming enemy missiles. When a missile gets dangerously close, the proximity alarm will sound which is the best time to launch countermeasures. It usually takes 3-5 units of countermeasures to effectively evade a missile, so you will usually want to hold the countermeasure button down when the proximity alarm activates. How you use countermeasures is critical to their effectiveness. CM's are basically an ECM type device that drops behind and below your ship slightly. Missiles will usually travel fast enough to get very close to you before the CM's can trick them into exploding. It usually takes 3-5 CM's to bombard a missile with enough radiation/energy to get it to explode before it hits you. CM's can point their focused energy signals at any missile in a 360 degree range, but they need time for their beam of energy to cut through a missile. If a missile is heading straight for you and you're moving forward at it, then you're leaving less time for the CM's to work. Best advice in that situation is to launch the CM's early (before the proximity alarm rings) to give 3-5 units enough time to hit the missile with focused energy and cause it to explode before it hits you. Cutting your engines can reduce your heat signature, improving the effectiveness of the countermeasures. You can also turn away from an incoming missile to gain more time to evade. 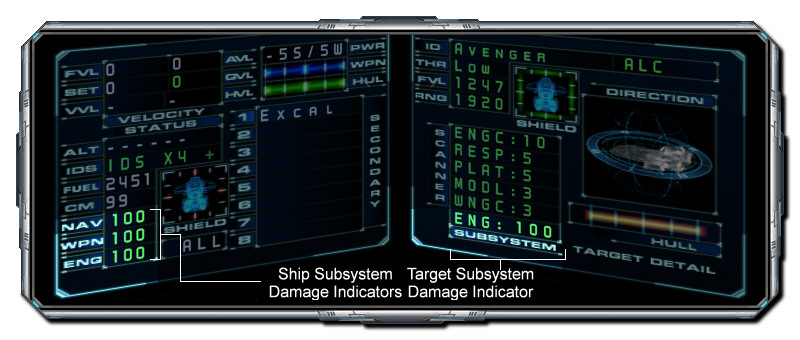
When your ship takes damage due to weapon impacts that your shields can't protect you from (due to low energy), a subsystem, equipment item, or weapon may be damaged. There are 3 main subsystems on your ship that can be damaged. The first is navigation, which can effect your radar and target direction pointer. The next is your weapon system, which can effect how often you can fire both primary and secondary weapons. The last is your engine management system, which can effect your speed. When each subsystem is damaged, a warning indicator will appear on the HUD next to your gunsight and the level of damage will be displayed in percentage on your ship status display. If you have a repair system installed, it will begin repairing the damaged subsystem(s) and any hull damage automatically. A good place to hide for repairs is inside a nebula cloud where sensor range in limited. If you haven't installed a repair system, then you will need to dock at a station or planet city to perform repairs, which will require a fee for the repairs. If an equipment item or weapon is destroyed, they can't be repaired and must be replaced. You can also target the subsystems of other ships (using the default U key). However, on small ships it's difficult to hit specific subsystems due to their speed and maneuverability, so targeting subsystems for small ships is best used for monitoring their status. For larger capital ships, you can effectively aim at a subsystem to disable or disarm them. However, such damage will be temporary until the ship is able to repair its subsystems. You can also target individual gun turrets on capital ships. If your target status display is set to the default damage mode, you'll see a small white highlight box indicating the location of the subsystem being targeted. The damage mode also indicates the level of damage for each of the target's subsystems using three colors, gray for little or no damage, yellow for moderate damage, and red for critical damage. The percentage of damage for the targeted subsystem is indicated at the lower left of the target display. 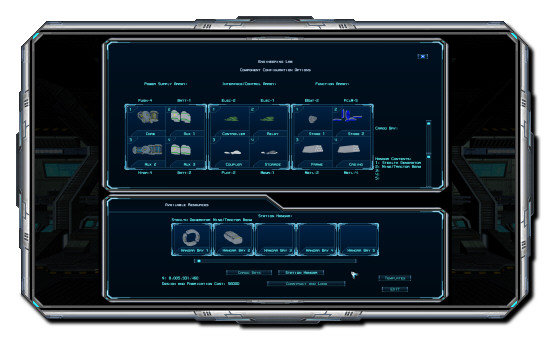
The engineering lab lets you construct equipment items from raw commodity materials. A build sequence is required where you must place specific commodity items in specific quantities within a specific pattern in order to construct an item. The engineering lab menu is split into two parts. In the top section, there are three stages of the build process with four individual parts each. The first stage is called the Power Supply Array and consists of a core with three auxiliary sub-sections. So the first step in building any item is to configure its power supply. The core will generally consist of some form of energy source with other optional energy sources and/or batteries also installed in other sections. You will select and apply the material type and the number of units of that material into each section to define how your item will be put together. The next stage is the Interface/Control Array and it defines how the power supply will interface with the item itself. There are controller, relay, coupler, and storage sections in this stage. This is where you'll generally need to install things like electronics, memory, and connection materials. The last stage is the Function Array and this is where you determine what the item will actually do with the components you arranged in the other stages. You can install things like energy emitters and radio transmitters. Then you need to select what material to build the frame out of and finally, what material to use for its casing. All of the components you can arrange in the engineering lab will have specific design attributes and dependencies that will determine what item can be built. For example, building one item may only be possible if you wrap it in a strong enough casing to handle the heat generated. As with other design systems in the game, the engineering lab also supports storing designs as templates for building later. The engineering lab will also let you build a few 'secret' items that can only be constructed using the lab and are not available on the open market. Such items can provide unique shield tuning, energy collection, and agility enhancements. The bottom section of the engineering lab provides selection options for items you have in your ship's cargo bay as well as items you may have stored in the stations hangar. Simply click on the 'Cargo Bays' or 'Station Hangar' buttons to select an inventory to browse. Scroll bars are available for both to view all cargo bays and/or all station hangar bays. You can retrieve items from either location to use in the engineering lab. Simply drag and drop the item you want and place it in the desired array section. If you build in the order of the menu sections, you can also right click on an item to quickly place it in the next available section. Right clicking on an item of the same type in the last available section will stack multiple units of that item into that section. Other friendly ships in the area may offer build tips for the engineering lab from time to time. They will usually expect to be paid for such information. When a tip is provided by another ship, the details are stored in both the flight log and engineering lab build templates list. If no space is available in the template list, the data will be stored in the flight log only. It's not really feasible to try and guess how to build various equipment items using the engineering lab. There are simply too many build parameters, item combinations, and quantity options to be able to effectively put together a formula randomly. You're welcome to try if you want to, but until you have some experience using the lab and putting together a few formulas, it will likely be very difficult for you to try predict what items may go where and how many to build something. Early on, it's best to focus on trying to acquire build formulas by retrieving lost data drives through exploration or by checking with other friendly ships in the area. 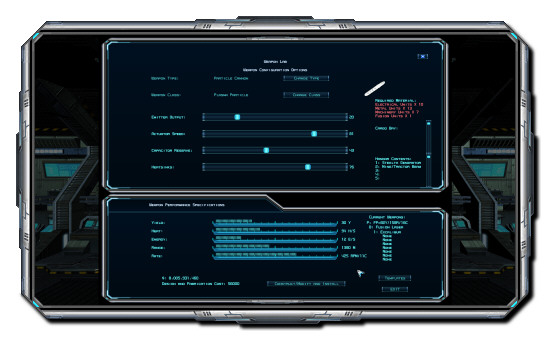
The weapon lab lets you design and build custom weapons from raw materials for a small fee. The weapons you design will require a certain number of different materials to construct and you must have those materials in your ship's cargo bay or in the local station's hangar. If you don't have the required materials, you will need to either buy them or mine them. The weapon lab will also let you save your designs as templates, so you can later retrieve exact specifications to rebuild weapons you've designed and saved earlier. You can design and build three different types of weapons: particle cannons, beam cannons, and missiles. Each type is divided into separate classes. Particle cannons have Plasma, Metal Projectile, Rail, and Fusion classes to choose from. Beam cannons have Refractor, Metal-Vapor, Coil, Neodymium, and Fusion lasers to choose from. Missiles are divided into Impact, Reactive, Fragmentation, Shaped Charge, and Compound Core classes. Each class has unique default attributes that may have advantages and/or disadvantages compared to other classes. For example, a Fusion cannon may provide a much higher default yield than a Plasma cannon, but at a significantly slower firing rate. The Weapon Lab menu offers slider bars in the upper part of the console display that let you adjust different parameters of a weapon's design. With cannons for example, you can adjust settings to trade off yield for a faster firing rate and vice versa. For missiles, you can exchange speed and range for a more powerful detonation. If you build a design and decide you want to try something else, you can sell the weapon at most locations to recover some of the cost. Custom weapons generally don't carry a high value and are not a recommended item for trading, but they can provide an important functional benefit for your ship in combat.
Ship Frames (Military)
Beam Cannons
Missiles and Secondary Items:
Weapon Range, Yield, and Firing Rates Particle Cannons
Beam Cannons
Missiles
Secondary Devices
- AS WITH MANY GAMES, USING SOME ROUTERS AND FIREWALLS CAN INTERFERE WITH THE MULTIPLAYER SYSTEM. REFER TO THE FAQ (FREQUENTLY ASKED QUESTION) SECTION AT THE WEBSITE FOR MORE INFORMATION. Multiplayer in Evochron Legacy features both human and computer controlled ships. Up to 35 human players can join together in each hosted game. You can play online or over a LAN (Local Area Network). You can meet for trading, combat, mining, cooperative contract objectives, racing, and exploration. Team up with other players for battles and claim systems for your faction, or fly solo and try to survive alone. You can recruit other players to protect your stations/cities or hire others to retrieve commodities for you. The trade console supports setting up contracts directly between players to destroy hostiles, destroy a specific player, or harvest material. When a player-to-player contract is completed, the arranged payment is automatically transferred to the hired player from the player that hires them and the game will auto-save both players. You can use the variety of available gameplay options to set up the kind of multiplayer universe you want. Some gameplay aspects are disabled or changed in multiplayer, to help provide fair gameplay and accommodate the data exchange conditions of multiplayer. Your single player faction affiliation is not effected while in multiplayer, so you can complete any desired objectives for a different faction without the risk of effecting your offline single player affiliation. A few single player contract types aren't available in multiplayer and racing is simply available in the trade console for human-vs-human racing. Also, the game will automatically save your progress under certain circumstances, such as when a trade is completed or when you jettison your cargo bay. Players can join together to cooperatively complete contract objectives. A contract link is automatically established when two or more human players are in the same sector and one player selects a contract from a station, carrier, or a planet. You can optionally terminate the contract link by clicking on Cancel Contract in the inventory console (this won't fail the contract for the other players if you cancel the link before anyone reaches the waypoint). When a contract is accepted, all linked players receive the contract details and waypoint (the destination position marker is also automatically set to the waypoint). All players can then jump immediately to the waypoint. For most objectives, if a player is destroyed, their contract link is terminated and they won't share in the payment. However, they can still rejoin other players at the waypoint to provide reinforcement. An exception to this can be a multiple waypoint patrol where a player can link back in when the next waypoint data is transmitted. If a player cancels a contract after the waypoint has been reached, it terminates the contract for all linked players. For players in the same sector, one player will be the flight leader for the group. This player has a primary link to the contract system and helps maintain objective and gameplay status for the group. The flight leader can also issue orders to friendly ships in war zones, if they have a high enough rank. The player who is the flight leader in the sector is usually the highest on the player list in the same sector, other players will see a '=' flash next to the flight leader's name while the flight leader themself will see a '-' next to their name. For some contracts (escort and multiple waypoint patrol), if the flight leader is destroyed it can result in failing the contract for the entire group. Players who are in the exit menu, hangar, or the shipyard when a contract is accepted will not be linked to the contract. Only players in the same sector who are in their ship or in a lobby will be linked for a contract when it's accepted. If your group does not want a particular player joining a contract, you will need to either destroy them or convince them to depart the sector before accepting the contract. Players jumping to the sector you are in after you have already accepted a contract won't be linked to receive payment (except for multiple waypoint patrols, which can allow a new player to join in when the next waypoint data is transmitted). Players who enter the sector after a link has already been established also won't be able to start a new contract until the current contract is finished, cancelled/failed, or the linked players leave the sector. Strategy is an important part of completing contracts as a group. For example, when accepting a spying objective, it's best to have one player fly close to the capital ship to complete the scan while other players provide cover. All linked players are paid the full amount each for the contract, it is not divided by the number of linked players. So the more players you can recruit to join a contract, the easier it will be to complete and the faster you can earn credits. Multiplayer also lets you race other players. Unlike the contract option to race AI controlled ships in the single player mode, the multiplayer mode provides a race challenge option in the trade console. To race another player, establish a trade connection with them, then click on 'Send Race Challenge'. The player that sends the challenge will establish where the race course is placed. It will be placed in front of the sending player at a heading of 0 and pitch of 0. As each player passes through all boxes, a text message will be displayed indicating the name of the player. The player who completes the course first is the winner and players can arrange prize credit amounts or other rewards to be traded after the race is finished. It's recommend that you place the course carefully and if you need to reposition it, simply open the trade console and submit the race challenge again once you are at the new location you want. Other players can participate in the same race by having one player send multiple challenges. The player sending the challenges needs to remain in the same location while setting up the race, otherwise separate courses will be placed at different locations. Another option in the trade console is transferring fuel in 30 unit intervals. This lets you rescue stranded players, sell fuel for profit, or give it away to help new players. Fuel can be a very valuable commodity in addition to trading other items. You can also link to another player's ship as a gun turret operator with the trade console. To do this, click on the 'Connect Gunner Binding' button. The player who clicks on the button will become the gunner. A frame will appear around the ship of the receiving player that will point in the direction the gunner is facing. The gun turret will be controlled by the same device the connecting player selected for flight control. The particle cannon and beam cannon that was on the connecting player's ship will be transferred to the gun turret. They will also have their own power supply for the weapons. Once the gunner binding is established, the connecting player will move with the pilot ship but will be able to point their cannons in any direction using a 'ball turret' type configuration. So when they aim their cannons straight up or down, left and right input will roll the turret left and right. Some functions are not available in the gunner mode including missiles, exit option, consoles, various displays, and more. The gunner mode is designed to be a weapon platform with a reduced HUD mode designed to facilitate managing primary cannons and monitoring the pilot ship's status. If the pilot ship is destroyed, both players will be destroyed, so they share the risk for the benefit of having significantly more firepower. Either player can terminate the gunner binding by clicking on the 'Disconnect Gunner Binding' button that appears on the screen. Once disconnected, the gunner will be returned to their ship at the current location. The gunner binding will also be terminated if the pilot ship leaves the sector, enters a station/city/carrier lobby, or enters the exit menu. The multiplayer mode also supports linked jump drive activation. If you form on another player using the formation option, your jump drive will be linked to theirs. If they activate their jump drive, your jump drive will also activate and be set to the same jump point. Once you arrive, your ship's targeting system will automatically attempt to re-target the ship you were linked to. One player may arrive ahead of the other, so the targeting system will continually scan for the linked ship for up to several seconds. If your jump drive can't reach the jump point destination, your jump drive will shut down and an error message will be displayed in the message log. For city and station modules built by players, the server program's multiplayer system stores the data for a unified gameplay universe, letting you or any other player construct cities and stations at new locations. The server operator can remove modules by editing a text file kept in the server program's folder. See the server program's instructions for more details. Stations you build in multiplayer are not carried over to your single player profile and vice versa, they are kept with the single player (profile) or multiplayer (server program) gameplay universe. Evochron Legacy allows you to quickly locate active multiplayer games over the Internet. After you select a profile, the multiplayer options will be available on the lower right portion of the main menu. Click on PUBLIC SERVER LIST if you'd like to join an Internet multiplayer game hosted by someone else. If there are any active public servers, they will be displayed in the middle of the menu that opens after you click on the PUBLIC SERVER LIST button. Simply click on a listed game to join one. If the server requires a password to join, the game will prompt you to enter one. Multiplayer games that require a password will have '(S)' at the end of their name and games that only allow multiplayer profiles will have '(MP)' at the beginning of their name. If the connection is successful, other players will receive a text message that you are joining the game. Once the loading phase is complete, you will join the session and start where you last saved. To host a multiplayer game, you will need to install the server program (the installer is included with the name and is located in the game's install folder, filename ELServer.exe). The server program will let you host a multiplayer game over a LAN, direct IP address or publically listed over the internet (if your system is properly configured to accept connections from other players over the internet). For publically listed games, your server will only be visible on the public list if you have properly configured your system to accept outside connections from other players as clients. Configuring a connection for hosting a multiplayer game over the internet for Evochron Legacy is the same as it is for most other multiplayer games that allow player-hosted sessions. The needed ports need to be open and forwarded to accept connections from other players. See the instructions included with the server program for more details. In case the internet game listing server is not available to you or if you want to keep your session private, the server program's default mode is a 'Privacy Mode' that lets you host a multiplayer session without adding it to the internet game listing system. When hosting this way, other players can connect to your session via direct IP (LAN or internet). For private or unlisted internet games, players who want to join your game will need to enter the internet IP address for your connection. If you're hosting a LAN game, then they'll need to enter the local address you selected. If you are hosting an internet game using a router or firewall, ports 24888 TCP and 24889 UDP need to be available to the game so other players can join. You can optionally change the ports from the default values in the IP selection menu by clicking on the TCP/UDP Ports button, but they will need to match the server's values that you are trying to connect to. Once you have selected the IP address for the multiplayer game you want to join, simply click on the CONNECT button in the main menu to attempt to connect to the server. If the connection is successful and the server responds, the game will begin the launch phase. If not, an error message will be displayed indicating the reason the connection process failed. Once you connect and complete the loading process, the server will transmit the current economic, territory, and local build module data to your system as your ship's startup process begins. Be aware that disabling a firewall, placing a computer in the DMZ, or opening ports can result in lower security for your network/internet connection. By disabling such security measures, it's possible for someone to break into your network and cause harm to your computer and/or obtain personal information from your computer. If you choose to disable your network security measures, you do so at your own risk. Once you have entered a multiplayer game, you can press and hold the tilde key (~) to show the IP address of the game and a list of the current players. The Scroll Lock key can also be used for keyboards that may not have a tilde key available. The sector each player is in will be displayed next to their name on the list along with both their civilian and military ranks. Keep in mind that although a player might be on the list or listed in the message log, they won't appear in the game until the loading phase is complete. So wait to send any messages to that player until you receive the notice that they've joined the game. The frames-per-second and ping rates for other players in the game will be displayed on the left of each player's name. The ping rate indicates the total time it takes to transmit and receive data from the server and values around or below 200 are generally good. If the ping rate stays at '---' for a player, they may have a rate around or above 450. If players are complaining about lag or disconnecting, the host can kick a player with a high ping rate and/or low frames-per-second (see the host options section below). If a connected player returns a frames-per-second value, but the ping rate continues to show '---', then their connection/system may not be able to keep up with the resource needs of the game causing their ping rate to be too high. Player names are also color coded yellow or red if their framerate performance is low. You can send text messages to all other players in the game by pressing the ENTER key, typing the message, then pressing the ENTER key again to send. You can also send a private message to the ship you're targeting by pressing ALT-ENTER before typing your message. The 'A' button to the left of the message log will also let you optionally limit the text messages you broadcast and receive to the sector you are in, if you want to limit the amount of chat messages that are displayed. Voice chat is also available and lets you talk with other players using your computer's mic (if available and compatible with the voice chat system). To send a voice message, hold the default NUMPAD-. (decimal/period) key and talk into your computer's mic. Release the key to stop broadcasting. Voice chat is available only while you are in the cockpit of your ship or in the main lobbies of stations, cities, and carriers. There are two voice chat modes you can select using the chat mode button at the bottom of the message box. The 'Sector' mode lets you send voice messages to all other players in the same sector. The 'Faction Only' mode only sends voice messages to other players with the same faction ID tag ('ALC' or 'FDN') in their callsigns. If you want to mute a specific player, hold the player list key (default tilde key [~] or Scroll Lock), then click on the voice chat button next to their name on the player list. The voice chat button will turn red and display an X when a player is muted. If desired, you can also turn off all incoming voice chat by changing the 'In-Game Voices' setting to 'Off' in the Options menu. Voice chat uses significantly more bandwidth than text chat, so if connection speeds are limited and/or performance problems occur, players may want to limit their chatter or the server operator can disable the voice chat system for all players. Evochron Legacy supports faction identification labels selected by each player when they sign into a multiplayer session. They can either join the Alliance 'ALC' or Federation 'FDN'. You can use this option to group players together on the same team. Players using the same faction affiliation will appear as green targets to each other while members of a different faction will appear as red targets. You won't be able to trade or join formation with opposing faction members that appear as red targets. When targeted, a player's faction affiliation will appear on the target status display next to their callsign, just like the faction affiliations of AI controlled ships in the single player mode. Other members of the same faction you are allied with will be tracked on the nav map when they are in the same sector you are in. Their ship locations will appear as green dots, making it easier to find and meet up with other members of your group. Click on the 'Ping' button on the left side of the nav map under the 'Waypoint(s)' heading to send a sensor pulse which will broadcast your location to all other players in the same sector (your location will appear as a green box on the nav map). Be aware that sending a ping in this way can reveal your position to enemy ships as well as the green box will appear on their nav maps as well. You can also optionally broadcast your position by text using the 'Trans Pos' button on the lower right corner of the navigation console.
REFER TO THE FAQ SECTION AT THE WEBSITE FOR FURTHER ASSISTANCE WITH TECHNICAL PROBLEMS OR QUESTIONS. - Evochron Legacy supports multiple control devices. On some systems, you may want to customize the names of the devices listed in the Configure Controls menu. To change the names of the listed devices, open the sticklist.sw file in a text editor and adjust each entry as desired. Next time you launch the game, the device names will appear as listed in that file. - Performance problems can occur on systems with limited video memory, integrated 3D video, low system resources, and/or slow CPU. Turning off the 3D cockpit and/or reducing details can improve performance during gameplay. If your computer has trouble keeping up with the resource requirements of this game (freezing, closing to the desktop, error messages, audio stuttering, slow mouse response, etc), make sure you are running the game by itself without any other unnecessary software running in the background. - If you want to change the location for where the game stores pilot profiles and other game files, simply create a text file in the game's installation directory (usually C:\sw3dg\EvochronLegacy) named savedir.txt and in the first line, enter the drive letter and folder name where you want the game data files to be kept. Example: C:\Users\Username\EvochronLegacy The game will automatically add the \sw3dg\EvochronLegacy text to the line you enter, so you don't need to include it. Make sure to copy/move the original files to the new location to keep your settings and pilot profiles. - Some keyboards may not support the tilde key input for the status key. The scroll lock key can also be used and you can also customize the key. Create a text file in the game's folder (usually C:\sw3dg\EvochronLegacy) with the filename statkey.txt and in the first line, enter the 'scancode' number of the key you want to use. A list of the scancodes for each key is available at this link.
Being an independent developer, my resources are very limited. This project reached completion with the help from several outside sources listed below: Thanks to Rich Douglas for creating the amazing music in the game. Thanks to Cleber de Mattos Casali for his work on the MultiJoy controller system. Thanks to Joel Sjöqvist for his help porting DBPro and related systems. Thanks to Ron Erickson for his help with the Oculus Rift mode. Thanks to Jim Burridge for his help with shaders. Thanks to Paul Johnston for the DBPro collision system. Thanks to Carlos Wilkes for his atmosphere shader. Thanks to Chris Kim, Ryan Anderson, Chris & Alex Burch, Mark & Randee Mcburney, and Mara Fullbright for donating some of the speech for the game. Thanks to Norbert Iacob for his work on creating the cockpits, ship models, city modules, station modules, and terrain walker in the game. Thanks to Philip Klevestav for the texture he created that was used for certain ship and module details. Thanks to Milosh Andric for several texture elements that were used for certain ship and module details. Thanks to Nikolay "Cyberion" Ivliev for creating many of the commodity, weapon, and equipment models and textures. Thanks to those of you who helped beta test the game. And to the players... I appreciate your patience and understanding when it took so long for one person to create media and program this project. I truly hope that all of you enjoy playing Evochron Legacy! |